Not Brave Enough

1990. That’s the year Home Alone came out.

Why am I awake, thinking about Home Alone at 5 AM on a Monday? Apparently, your brain makes funny connections when your seven-year-old daughter wakes you up to get her sound machine and stuffed dinosaur from the basement at 4 in the morning. (She had slept downstairs with her cousin the night before.)

Scared of the basement…Learn where the light switches are, kid…Although, Kevin McCallister was 8, and he was scared of the basement, and look at what he accomplished. Man, what an awesome movie. When did it come out…1990? Holy crap, Ellery is exactly the same age that I was when Home Alone came out…And that was…29 years ago…

And just like that, I’m wide awake and pondering my own mortality. And suddenly realizing that in about a third of the time that has elapsed between the release of Home Alone (which, let’s be honest, feels like yesterday) and the present, my oldest child will be packing her bags to go to college. And it’s the exact amount of time that I have been out of college. And I’ve spent every one of those years working for someone else. While dreaming about doing something else.

And that is why I’m self-employed.

Will I fail? That’s a definite possibility. One that I am prepared to accept. But life is short. A few people in the last week have congratulated me on having the courage to chase my dreams. I really don’t think that’s necessary. My family isn’t going to starve. If things go badly, it might mean taco night includes more rice and beans and less beef. We might have to put off buying new cars for a few years. The worst-case scenario is that I have to go back to being an employee. Is it really all that scary? I’ve already done it for a decade. What scares me is the thought that I might look back at my life and realize that I never tried. I don’t think I’m brave enough to take that risk.

You probably thought this blog was dead.

That’s never a good way to start off a blog post, but with a grand total of five posts since June 2016, you’d be forgiven for thinking as much. The last three posts, from just over a year ago, were in reference to the workshop that I was planning to build. If you follow me on Instagram, then you already know that the workshop has been “finished” since earlier this year. I’m pleased with it.

Okay, that’s an understatement. For more than a year, I poured sweat and stolen hours into this workshop. I sawed thousands of feet of oak, pine, and poplar. I built trusses, doors, and restored vintage windows. I hammered nails until my shoulder throbbed, and then I kept hammering. This shop is the culmination of two years of planning and work. It’s not big, and it’s not perfect, but I’m damn proud of it. There are still a few projects (insulation, interior paneling, and stairs) to work on before I can remove those quotation marks around the word “finished”, but at least my tools and workbench have a home.

The big news today – and the reason for the re-emergence of my blog – is to announce a change in my life that will afford a few more hours each week within these walls, and perhaps (fingers crossed) even a couple of hours for blogging. That’s right. Beginning this week, I leave behind the cozy comfort of gainful employment and begin life anew as a “business owner”. I’ll still be working about 3 days a week as a contractor for my former employer – and only one day a week at the office – which feels like a good balance to me. I quite enjoy the work that I do there, but I less enjoy being tethered to a desk for 45 hours a week.

My new life as a “business owner” gives me a laundry list of new obligations: quarterly taxes and accounting; marketing and business development; and perhaps most intimidating, learning to make things out of wood for profit and not merely for pleasure. I realize there is often a disconnection between “what I want to make” and “what someone will pay me to make”. I hope to bridge that gap over time. Meanwhile, my risk-averse wife would kindly appreciate your positive thoughts as I recklessly throw our steady, predictable life into utter disarray.

Designing My Workshop, Part 3: First Principles

After reflecting upon the past shops that I’ve inhabited and exploring some of the more appealing the shops of my fellow woodworkers, I thought long and hard about my own priorities. Much like when home-buying, it’s easy to let your imagination run wild, but there is a delicate balance to be achieved. Inflation of the footprint and architectural finery are appealing, but they add time to the build (and subtract time that I get to spend in the shop). But an unattractive or too-small shop is something that I would regret every time I stepped inside.

The basic principles that I came up with are thus:

Enough is enough. As noted previously, I’ve worked in shops that ranged from 192 sq.ft. to 900 sq.ft. I have not found the functionality of a shop to be strongly correlated with the size of its footprint, but I know well enough that a shop less than 200 sq.ft. won’t comfortably hold the equipment that I wish to use. Curtis Buchanan uses an equipment mix that appeals to me, and if he has been happy with a 16’x20′ shop for more than two decades, it stands to reason that I should as well. My shop will be at least 320 sq.ft., and not much bigger.

It’s not a garage. Every workshop that I’ve ever used has been a multi-use space for storage and disparate hobbies. In addition to woodworking equipment, the workshop served as a repository for electrical and plumbing tools, lawnmowers and oil-changing supplies, even Christmas ornaments and Easter baskets. No more. My workshop will not be a garage, but a woodshop, and I will reserve the same ire for extraneous appurtenances that Baptists reserve for halter tops in the sanctuary. To that end, one requirement will be a large lean-to to keep lawn mowers, fertilizer, tillers, and 2-cycle engine oil away from my dovetail saw.

Tradition is timeless. Yeah, I know that metal buildings are cheap and they go up in two days. I don’t care. I’m not going to look at this in my backyard every day for the rest of my life:

Ugly metal building
But that doesn’t mean that I aim for pretension or excess (looking at you, Victorians…) Rather, I’m drawn to the clean, simple look of rural farm buildings, built by competent craftsman who were skilled at balancing aesthetics with expediency and functionality. Something like this:

 
No sweat. I have never had the pleasure of working in a climate-controlled shop. Three out of four seasons, that’s not so bad. Spring and autumn are lovely in the South, and winter is easily addressed with an extra sweater on all but the most frigid of days. But summer will turn a tin-roof shack into a sauna (sans the naked Swedes). No more. My shop will be insulated, air-conditioned in the summer, and heated by wood stove in the winter. The more stable interior environment will not only be more pleasant, but also  reduce wood movement as furniture moves from the workshop to the house.

Don’t let the sun go down on me.  Natural light is important, but it’s not all created equal. I once had a shop in North Georgia with a dramatic southwest-facing view of the valley below and the mountains beyond. I foolishly placed my workbench directly beneath the window and quickly learned that the harsh late afternoon light was more hindrance than help. My shop will have big windows located on the northeast and northwest sides of the shop, with workbenches located beneath.

Let’s get high. Low ceilings suck. I once worked in a shop with 7′ ceilings. You can imagine how fun it was to work with 8′ lumber in there. Nine feet is the bare minimum for a workshop ceiling. Ten is better. Any higher than that approaches overkill, unless you’re doing specialized work that requires it. It’s nice to have a rafters low enough to hang your patterns – just ask Peter Follansbee.

follansbee hanging from the ceiling

Wood is good. Concrete floors suck. They’re hard on the knees and feet and even harder on your chisels and planes when you drop them. They’re an invitation to rot for any wood that touches it. My floor will be wood – no exceptions. And continuing with the idea that aesthetics are important, I also have a strong preference for wooden wall paneling. Wood is warm and attractive, and it makes a woodshop look like a woodshop. It also make it easy to hang tools on the walls – no sheetrock anchors required.

Lofty goals. I don’t think it’s a coincidence that all of the workshops I shared in the last post have storage lofts. No matter how hard I try to keep my workshop free of clutter, the truth is that it’s impossible not to accumulate infrequently-used templates and jigs and special odds and ends of wood and hardware. A small space for these items, out of the way and above the main workshop area, is a privilege that I’ve never had but would like very much to experience.

And finally,

Inside out. Flip open a copy of Better Homes and Gardens, and you’re likely to find advice on designing your home to ‘bring the outside in’. Well, I want just the opposite. A comfortable porch to set out my shavehorse, sawbenches, or hewing bench when the weather is pleasant is high on my wish list.

Empty

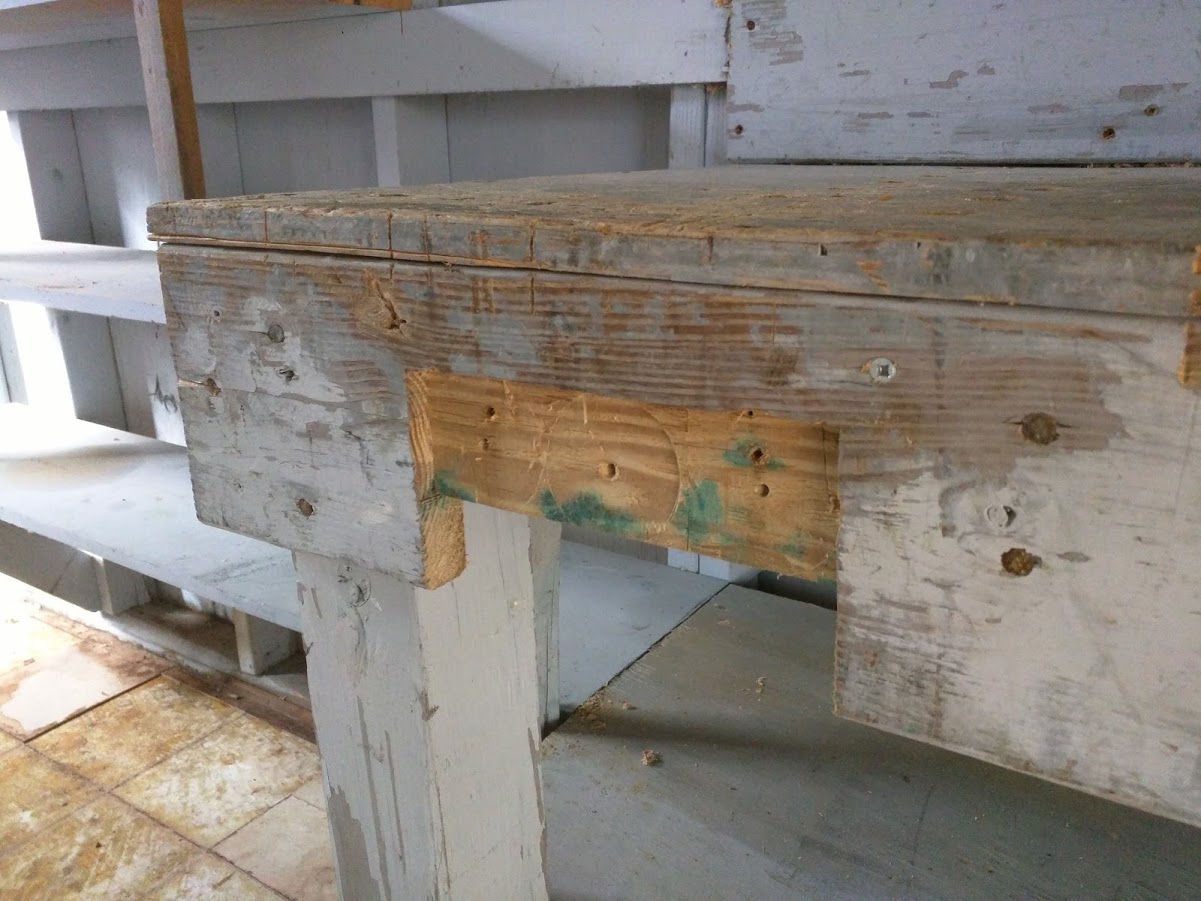
Yesterday, I took one last walk through the empty green plywood shack that served as my workshop for the past 15 months. It’s a curious little building. The wiring is a mix of modern Romex and salvaged lamp cords. Lights are placed haphazardly, and only a couple of them show any evidence of use in the last decade. The north side is slowly being consumed by the adjacent sand dune. I though about digging it back and fixing it when I first moved in, but honestly I was a bit concerned that the sand dune was a structural member at this point. Best to let sleeping dogs lie. An unpleasant side effect, though, was a shallow flood in the shop floor during every thunderstorm. I made peace with it by storing my lumber and tools off the floor and opening the doors for ventilation when the sun came out.


There was a workbench of sorts when I took possession of the property. It was about four inches too high, but I remedied that after my first exhausting planing session. The top was 3/4″ plywood, but I braced it with battens screwed in from below. There were no workholding devices, but it was a simple matter to let in a face vise. No hope for a tail vise, though: the right side of the work bench butted up against a wall.

There was no room for my power tools in this diminutive abode. I sold my tablesaw and my drill press to my brother. I loaned my bandsaw to my Dad. I sold my surface planer at a yard sale. Luckily, a lathe doesn’t take up much room – I was able to squeeze it in underneath the shop’s only window.

In spite of all of its shortcomings, this little shop enabled some of my most productive time as a woodworker. A kitchen table, a candlestand, three Windsor chairs, a tavern table, a shavehorse, a side table, and many spoons, bowls, plates, and pieces that I never even bothered to mention were birthed in that shop. All in a brief 10-month bout of inspiration. I became a competent spindle-turner, an efficient hand-planer, and a half-decent drawknifist (I’m just gonna pretend that’s a word) in that shop.

The learned eye would recognize my presence in an instant.

The mortise for the old face vise:

workbench2

The scars of countless chisel strikes and saws marks:

workbenchscars

Not to mention the double-row of dog holes.

Will a learned eye ever set foot in this shop again? I doubt it. But I’m happy to know that I’ve left my mark on this place. Yeah, I know. It’s a humble, dingy place. A shitty setting for Instagram photos. I leave with the hope that a brighter setting awaits my arrival. But I was there, and a part of me with always be there.

Goodbye, Fernandina Beach. Best of luck.

P.S.: WordPress tells me that it’s been 5 months since my last post. I never meant to leave you that long. But a funny thing happens when a hobby begins to feel like an obligation: I lose interest. I doubt I’ll achieve the several-post-per-week production pace of my early days, but I do plan on keeping a little better track of things than I have recently. I suspect the internet is at least as permanent as my old workshop, so I’ll continue to try and leave my mark here as well.


Plimoth

A place that has been on my bucket list for a number of years is Plimoth Plantation – the living history museum in Plymouth, Massachusetts where Peter Follansbee worked for 20 years, and cut his teeth as a 17th-century New England joiner. Sadly, most of the museum’s long-time reenactors departed in what seems to be a less-than-amicable split a few years ago, and Peter was among them.

Nonetheless, I decided to swing by on my way to Greenwood Fest a couple of weeks ago, and I wasn’t disappointed. Peter’s fingerprints are all over the place.

A few of his pieces (including the court cupboard and the chest with drawers pictured below) are housed inside climate-controlled buildings. These painted pieces are admittedly a bit garish to modern eyes, but they give you a chance to see the pieces as the would have looked when they were brand new, 350 years ago:


Most of Peter’s work can be found in the village: a collection of mostly one-room timber frame cottages. The buildings are as quaint as you can imagine: sheathed in weathered, riven oak clapboards, topped with roofs of thatched cattails, each one with a neat kitchen garden in the back yard. If someone had a bed-and-breakfast that was set up like this, I’d be the first to sign up!


The home’s interiors are dimly lit but surprisingly welcoming. There are no “fireplaces” to speak of – just a rocked wall in a corner where the cooking and heating fires are built. Some of the homes have real chimneys, but others just have a small vent atop the gables that keep the smoke moving out of the house. It was more effective that you might imagine! All of the homes were appointed with a bed and basic kitchen implements, not to mention a slew of joined oak furniture.


There were chairs of all kinds from basic joint stools…

…to proper joined and turned chairs:


Not to mention carved boxes of all kinds:


For me, the best part about the visit to Plimoth was the opportunity to appreciate the visual impact of Peter’s work in situ. When you see 17th-century carving as it is meant to be seen – i.e., in dim dwellings primarily illuminated by raking light from small windows or lamps – it makes perfect sense. The shallow relief carving stands out proudly in these conditions. The chests and cupboards looked alive in the humble cottages, as compared to similar pieces in the immaculately lighted and air-conditioned environs of the museum.

I was also reminded that homes from this period, with their hewn timbers and organic wattle-and-daub walls, were not deprived of texture as we are with our sterile sheetrock boxes. It doesn’t take much to stand out against a blank slate. These pieces that seem garish or “busy” against a plain background fit cozily into the more lively interiors of their day.

So, while I don’t necessarily intend to switch my focus to Jacobean carving after my visit to Plimoth, I can certainly say that it was an inspiring and informative visit. The chance to touch this furniture, to open doors and drawers, and to photograph (without getting yelled at) is a rare opportunity at any museum. I wished very much that I had been able to visit five years ago, when Peter and Paula the rest of the Plymouth Craft gang still inhabited the grounds. But it’s safe to say that their spirit is still present, and it will be for a long time.

Sole Discretion

The topic of plane soles – as in smooth vs. corrugated soles – is one that often evokes impassioned opinions. Thankfully, it doesn’t seem to crop on woodworking fora as often as other touchy subjects – like, say, sharpening or SawStops. Many users have no preference one way or another, but those who have formed a opinion typically view corrugated soles with a level of contempt normally reserved for laser-guided handsaws.

Paul Sellers has made his opinion known:

…corrugated soles grab shavings, especially super-thin ones that cling to the grooves of corrugated soles. Even flat soled planes do this. The problem inherent to corrugated soles is the grab and mush up in the grooves and on subsequent forward thrusts, damage the surface you are supposed to be smoothing. No craftsman I ever knew favoured these planes…It also damages corners and edges of wood when you start to plane angles such as chamfers or form bullnoses to things such as box lids, window sills and stair treads.

Yikes. Sounds like something I’d like to avoid. So what’s the point of the corrugations in the first place? Paul addresses that as well:

The corrugated sole was produced in Bailey pattern planes for a period with the intention of reducing the surface area of the sole to further reduce the friction of the plane on the surface being planed. Indeed it does do that…

Paul is actually kinder to corrugated planes than some other authors, who opine that corrugated soles do nothing to reduce friction, making them worse than useless. Well, I have been using the three planes pictured below for the past several years, so in the name of good fun, I would like to offer my contradictory assessment:

Soles
From top to bottom: Craftsman No. 5, corrugated; Stanley No. 6, smooth; and Stanley No. 7, corrugated.

Aside from the Stanley No. 4’s that you see peeking into the upper right corner of the photo, these three planes chew up the bulk of the shavings that are produced in my woodshop, and they have done so for quite some time. The No.7 is my most recent acquisition (from 5 years ago), while the No. 5 is my oldest companion (the first decent hand plane I ever owned, from 10 years ago).

So without further ado, here are a few unfiltered observations about the performance of these tools, with regards to the sole:

  • The corrugations do indeed drastically reduce the friction; I can easily use the No. 5 and the No. 7 without wax, whereas the No. 6 is nearly impossible to push once the wax wears off.
  • I don’t necessarily view the additional friction of the smooth sole as a bad thing. It’s just a gentle reminder to wax your stupid planes.
  • I rarely/never have an issue with shavings clinging to the corrugated soles. This is very likely related to the fact that I rarely/never make “super thin” shavings with my corrugated planes. The No. 5 is set up as a fore plane; it has a strongly cambered blade for hogging off meaty shavings, often cross-grained. The No. 7 is used almost exclusively as a jointer, for truing up edges; the blade is sharpened straight across, and it takes substantial shavings that curl up into neat, tight spirals. There’s simply nothing to get caught in the corrugations. None of my smoothing planes have corrugated soles, but I can certainly see how this might be an issue with their tissue-thin shavings.
  • Finally, I’ve never had much of problem with the corrugations damaging chamfers or bullnoses. For one thing, I would never use my jointer for this task (no use pushing more weight than necessary). And secondly, if I do use my fore plane (AKA No. 5), it’s only to hog off the bulk of the waste; I would inevitably follow with the smoothing plane set to a finer cut to tune up the edges.

In summation: Corrugated planes are fine for most situations. I think they’re particularly well-suited to jack planes/fore planes that take the coarsest shavings and can benefit from a little friction reduction. I would personally prefer a smooth sole for smoothing planes, but if I found a great deal on a corrugated No. 4, I certainly wouldn’t pass it up. For try plane/jointer planes, I don’t think it makes a nickel’s worth of difference either way. Just be aware that with the more massive smooth-soled planes, you’ll definitely need to keep the sole well-waxed, which is frankly a habit that you should get into anyway.


Stop Being So Clingy.

This is may be a mundane blog topic, but I hope some find it useful as well. On the rare occasions when I’ve used full-size patterns to cut out my furniture parts, I’ve typically relied on good ol’ spray adhesive to stick the patterns to the wood. It works, but it also sucks, for many reasons:

  1. You only get one chance to orient the pattern properly. Don’t you dare try to slide it around or remove a wrinkle after it’s stuck.
  2. It’s expensive.
  3. Removing the pattern is a messy process that usually involves soaking the paper with mineral spirits and waiting a few minutes to peel it off. Then you have the pleasure of wiping off the adhesive gunk.
  4. Do we really need another disposable aerosol canister in our lives? No, we do not.

Fortunately, there is a better way, and it’s already in your kitchen cabinet:

Flour

That’s right, all-purpose flour. Dump a handful into a bowl, mix it with water until you have a soupy consistency (it should be thinner than white glue), and brush a generous quantity onto the pattern with a paint brush.

Layout

Apply the pattern to the wood, remove any wrinkles, and re-position it if need be. It’s very forgiving, and you have a few minutes to work with it. I found that applying a coat of water to the pattern after it’s in place helps it adhere completely. Now just wait a half hour until the pattern is completely dry, and it’s ready to cut. To remove the pattern, brush it with water and it comes off easily after a minute or two, and the flour paste wipes off with a wet cloth.

Cheap, simple, effective, non-toxic, and you already have the materials in your home. Seriously, what’s not to love?

One final tip: I bought a huge roll of kraft paper from the hardware store a few years ago. I use it for everything: the kids color on it, it makes a snazzy heavy-duty gift wrapping, you can roll out a layer as a drop cloth for painting, and it of course it is excellent for making full-size furniture drawings and patterns. And I still have another five years to go before it’s all used up.

Inspiration Doesn’t Strike…

You have to work for it.

At least, that’s my experience. Maybe that means I’m not very creative. Actually, I’m quite certain that I’m not very creative. I am analytical to a fault, and indeed, many of my blog series (The Name of the Grain and Woody Wednesday, for example) as well as my job title (Forest Resource Analyst) reflect that. Perhaps that’s why I naturally gravitate towards historical furniture forms. There is something comforting about building furniture in a tradition that incorporates the evidence of a thousand years of failures and successes. Why re-invent the wheel when it’s already been refined by countless generations of craftsmen more competent in their trade than I can ever dream of being?

More often than not, when I find myself departing from tradition, it’s to accommodate a special piece of wood that simply doesn’t fit into the classical canon of furniture forms. Such is the case with my current project. My dad asked me to build an end table. He already had the wood picked out for the top – a slab of white oak 15″ wide, 40″ long and 1-5/8″ thick. It’s a lovely piece of wood, cut from a crotch with plenty of flame figure – but it also has plenty of defect.

The wood was cut in a manner that is opposite from the way that a crotch would normally be sawed. Woods like walnut, cherry, and birch normally display the best figure when the crotch is sawed, as my old friend Tom would say, “like a pair of britches lying flat on the floor” – with each fork representing a leg. Oak, on the other hand, usually presents the best figure when the wood is sawed perpendicular to the customary orientation.

Log drawing
Typical method for sawing oak crotch. Note that this is the opposite from the usual method.

The problem with this method is that it includes the pith in every flitch. Anyone who has ever sawed their own hardwood lumber is well aware of the problems with the pith. The juvenile wood immediately adjacent to the pith often has a life of its own, bending and twisting as it dries. And the nature of wood shrinkage means that the odds are good that you’ll have cracks in any board that includes the pith. My dad’s slab was no exception.

Oak Crotch
The slab of wood at issue.

Fortunately, the slab was large enough to salvage a sizable chuck of wood while completely discarding the pith. The result was an elliptical tabletop, 13″ wide and 24″ long.

Ellipse
Keep the best, chuck the rest.

The problem, at this point, was that I had very little historical precedent to work with for designing the base. Oval end tables – especially tables that utilize a piece this thick – are scarce. Now, this isn’t the first time I have found myself in “modern furniture” territory. I detailed my design process for my tripod kitchen table in the early annals of this blog. Basically, it involved typing some descriptive keywords into a Google image search, plucking out a few designs that I really liked, and modifying them to suit my preferences. In this case, however, Google was of no help, and I found myself starting from an empty slate.

So, I did the only thing a non-creative person can do in this situation: I sharpened my pencil and got to work. I started sketching stream-of-consciousness until I stumbled upon an idea worth pursuing. I’ll warn you, the process (or maybe just my sketching ability) isn’t pretty:

Most of the sketches belong exactly where they are: on the cutting room floor. But I thought that the sketch at the bottom right of the first page had potential, so I explored it further on a second page, playing around with the dimensions of the members as well as the horizontal and vertical proportions of the whole structure. I really liked the way the curves flowed through the joinery and the arch at the bottom reflected the ellipse of the top. I decided this design was the winner.

Full-Size Sketch
I’m too lazy for prototyping, but a full-size drawing is time well spent.

It was time to make full-size drawings – a step that I rarely take, but I felt that it was necessary to get a realistic idea of the proportions. My first iteration, with 3″-wide members, was a bit to heavy, so I revised the drawing to 2″ members. That looked right to my eye, and I was satisfied enough with this drawing to begin the painstaking process of animating the idea in ligneous flesh.

Layout

But as always, the ultimate question is not “Does it look good on paper?”

Butterfly

“The caterpillar does all the work, but the butterfly gets all the publicity.”

-George Carlin

I felt like a caterpillar last week. My latest project involves an oak crotch so riddled with cracks and shake that would have been better suited to the firewood pile were it not for the alluring flame figure of the grain. Just making the slab usable involved inlaying a dozen butterfly patches to stabilize the defects. Few people will look at the end result and understand the work involved, but it was enjoyable work nonetheless.

I’ve always found butterflies to be a bit tricky to make by hand. They are small and annoyingly difficult to clamp. The solution is to keep them attached to a larger block for as long as possible.

1 Sketched
1) Mark out your cuts on a piece of wood that is quite a bit longer and wider than the butterflies that you intend to make.

2 Kerfed
2) Cut a few kerfs down to the “waist” of the butterflies. You can also cut between the butterflies, or you can wait until after the next step.

‘v

3 Chiseled
3) Using a chisel that is wider than your board, chop out the bulk of the waste, then carefully pare down to the lines, being especially careful to keep the sides of the butterfly perpendicular to its faces. Side note: Trying to cut these things using just a backsaw is a fool’s errand. You can do far more accurate work with a chisel, and it really doesn’t take any longer. Trust me, I’ve tried it both ways, and this is the way to go.

5 Finished
4) Now you can free the butterflies from the blank. On the opposite side, cut another kerf to the waist and remove the waste with the chisel.

6 Various Sizes
5) Now your butterflies are ready to inlay. I made a variety of sizes to avoid a monotonous look. I can match the size of the butterfly to the size of the crack.

7 Scribed
6) To inlay the butterfly, begin by locating it on the crack and carefully striking a line around it. Deepen the line with a chisel, tapping lightly with the mallet. The outlining is the most critical part of the inlaying process, so keep your focus and do it right.

8 Drilled
7) At this stage, methods will differ. Some people like to use a router to remove the bulk of the waste. I would rather sell my first-born to cannibals than use the screaming-devil-spinny-tool when it isn’t absolutely necessary, so I opt for a cordless drill and a Forstner bit instead. I shoot for a depth somewhere between 3/8″ and 1/2″. It isn’t critical, as long as it’s consistent.

9 Fitted
8) The remaining waste is evacuated with a few chisels. Very handy to have a bevel-edge chisel with a bevel that actually goes all the way to the edge for this task. It’s nice to get the floor as consistent as possible, but more of your focus should be on getting the walls vertical and cutting right-up-to-but-not-over the scribe lines.

10 Flushed
9) Don’t spare the glue when you put these things in. Tap it in with a hammer, saw it flush, and level it off with a hand plane. Ahhh, that’s a nice fit. Ten more to go…

Hardingfele

Last week, I shared a few memories from a wedding that we attended in Norway last summer. One of the most beautiful and memorable parts of the wedding was the music. As I mentioned in the last post, processionals are traditionally led by a fiddler, and in this particular part of Norway, the customary instrument is a local variant known as the hardingfele.

In typical Norwegian style, the hardingfele is sumptuously ornamented to an extent not seen on the common violin. The fingerboard, tailpiece, and purfling are inlaid with a geometric design of bone and mother-of-pearl. The soundboard features delicate florid kolrosing, and peg box is often topped with a dragon carving in lieu of the familiar scroll.

Hardingfele

Though outwardly attractive, the soul of the hardingfele resides not in the baroque Scandinavian styling, but in the four understrings that run inconspicuously beneath the fingerboard. Due to the extra strings, the hardingfele can be recognized at a distance by its eight tuning pegs, rather than the conventional four. When played, these strings resonate under the influence of the primary strings and impart a richness to the music that seems perfectly suited to the simple melodies of Norwegian folk music.

Compare the vibrant self-harmonizing effect in the wedding processional (which was played on a hardingfele):

to the more formal and reserved melody of the recessional (which was played on a regular violin).


Both are beautiful, of course, but I’ve come to appreciate the simple regional traditions that add color and complexity to the tapestry of human culture. If there was a pervading theme to my trip to Norway, it was my continuous amazement at their dedication (and success) in weaving ancient tradition with modern culture. Their country may rank near the top of the list in modern infrastructure, internet access, wages, and quality of life, but they also cling dearly to their cultural inheritance. Old buildings are unquestioningly preserved and maintained, slöjd is still taught in elementary schools, traditional food and dress and folk music are alive and well.

During my visit, I constantly felt as though the past was a part of the present, rather than some harsh, distant era. I think as Americans, we have stronger reasons to keep our past at an arm’s length, because some of the uglier episodes of our history (segregation, slavery, and the near-annihilation of Native American culture, for example) have not been seasoned by the centuries as they have in Norway (e.g., Viking culture). My recent visit to the Aiken-Rhett House was impressive, but I could never fully escape the reality that the massive home was built and maintained on the backs of slaves. Nor would I want to forget. I suppose also that the simple lack of a cohesive national identity – we are a nation of immigrants, after all – contributes to a widespread indifference towards our past. After all, my past is very likely not at all similar to your past. Perhaps another thousand years of existence will give us the perspective that we need.

Okay, that was a rather long aside in a post that is ostensibly a discussion of a fiddle. Let’s get back on track, because there are a couple more notes I wanted to include: The fiddler at the wedding is Øystein Rød, who is not only a good friend of the bride; he has also been named the best fiddler in the country! He actually wrote the music for the processional. The song is called “Gledden” (“Joy”, in English). I’m including another version of him playing this song, since the sound quality is much better. The passion and precision of his music is breathtaking. I think it’ll be worth 3 minutes of your time to listen.