Designing My Workshop, Part 2: Other People’s Workshops

In Part 1, I shared a brief description and some lessons learned from each of my past workshops. Today, we’ll explore a few of the exceptional workshops of fellow woodworkers that inspired and informed my own design. (Be sure to click the links for a more in-depth look than I offer here). One thing you might notice if you’re familiar with these folks: They’re all Windsor chairmakers. Though it wasn’t a conscious decision to focus on the shops of Windsor chairmakers, it will come as no surprise if you’ve followed my interests on this blog. These guys use the tools that I like to use, and they work in ways in which I like to work. They designed their shops to be efficient with hand tools (and they know a thing or two about aesthetics to boot).

Greg Pennington’s workshop:

shop4

shop3

Dimensions: 18′ x 36′ (648 sq.ft. on the ground floor, plus a loft and porch)

Construction: Timber frame, asphalt shingle roof, clapboard siding, wooden floors and wall paneling.

What I Like About It: Okay, let’s be honest. Greg’s shop is freaking gorgeous. Exposed post and beam construction, endless expanses of wood from floor to ceiling, windows on every wall. If I had unlimited time, this is the kind of shop that I would prefer to build. It’s a big, it’s inviting, and it’s finished out to a tremendous degree.

But… Greg uses the space to teach chairmaking workshops for several students at a time. It’s quite a bit more space than I can justify for the work that I do and the equipment that I use. And though the idea of a timber frame is appealing, I lack the tools and experience required to do an efficient job of timber framing. I’m completely on board with the wooden paneling and big windows, though.

Curtis Buchanan’s workshop:

Curtis Buchananan Workshop

CurtisBuchananan Workshop

Dimensions: 16′ x 20′ (320 sq.ft. on the ground floor, plus a loft and porch)

Construction: Timber frame, metal roof, board-and-batten siding, wooden floors and wall paneling.

What I Like About It: At less than half the size of Greg’s shop, this workshop is an appropriate size for a single woodworker – after all, it’s been the birthplace of Curtis’ phenomenal chairs for more than 20 years. It features wood floors and paneling and windows throughout. I especially like the well-used porch that wraps around two sides. A porch is the natural place to use a shavehorse, and it provides a lot of extra workspace for minimal effort. The unpainted exterior is attractive, unpretentious, and it saves time and money.

But… Curtis’ only power tools are a lathe and a bandsaw. I will be looking to house a few more electron hogs than he does, so a bit more space might be handy.

Elia Bizzarri’s workshop:

EliaBizzarri Workshop

Elia Bizzarri Workshop

Dimensions: 18′ x 28′ (504 sq.ft. on the ground floor, plus upstairs)

Construction: Stick frame, metal roof, clapboard siding, wooden floors and wall paneling.

What I Like About It: Killer paint scheme. I would totally copy it, if it didn’t utterly clash with my green-and-tan house paint. Besides that, I love the big double doors for moving equipment in and out with ease and the triplet of north-facing windows above a massive workbench. Like the other two shops, the wall paneling and flooring is wood, and it has a loft for storage. The size is just about perfect. An under-appreciated design element that I really like is the generous roof overhang. In the balmy Deep South, where wood rots if you sneeze on it, adequate protection from the weather is critical if you intend to use wood siding.

But… I really want a porch on my shop. Besides that, this approaches my Platonic ideal.

______________________________________________

So there you have it. Those are the three workshops that were agitating my gray matter as I sat down to make plans for my workshop. From these shops, and from my own experiences, I made a list of, let’s call them “first principles” for my workshop design. I’ll cover them in the next installment.

Fits and Starts

As a hobbyist woodworker, I love having the complete freedom to pursue my interests. Spoon-carving? Cheap, easy and portable. Bowl turning? Wet, ribbony shavings of bliss. Kitchen table? Nice to have a big project every now and then. Side tables? I can knock one out in a weekend! Windsor chairs? The decathlon of woodworking skills, bring it on.

The problem with having this much freedom – and so many disparate interests – is that I end up with more than enough rope to hang myself. I take on too much at once, and with no looming deadlines to focus my attention, I flit from one project to the next while nothing much gets accomplished at all.

Such was the situation that I found myself in about a month ago. I had a side table close to completion (Inspiration Doesn’t Strike…), a continuous-arm high chair with all of the parts made (some assembly required) and a billet of thick curly maple that’s been kicking around my shop since this spring as my friend patiently waits for me to turn it into a gunstock (hunting season, the ostensible deadline, seems perpetually distant). Not to mention a half dozen other projects too piddly to mention.

When I find myself stumbling over half-finished projects every time I enter my shop, I know it’s time to buckle down and get something out the door.

I decided that the high chair would be the first project to cross off of my list. There really wasn’t that much left to do, and I’ve done it all before.

Evening 1: Turn the oven-dried tenons to fit, bore holes for the stretchers, and assemble the the undercarriage.

Evening 2: Bore holes into the spindle deck and the arm rail, shave the spindles to size, and dry fit.

Evening 3: Assembly time! Shave a buttload of oak wedges, warm the hide glue, and cross my fingers.


And just like that, a project is out of my shop ready for a finish.

This chair will be black-over-red, like all the others. To be honest, I’m getting tired of this paint scheme (this will be my fourth Windsor chair of the same complexion), but since all of these chairs sit around our dining room table, my wife has reasonably requested that they match.

I will eschew the milk paint on this chair, which has given me grief and mixed results in the past. I plan on mixing up some red oil paint for the base coat and some black tinted shellac for the topcoat. Aside from its ease of use, the biggest benefit to starting with red oil paint is that it will require several days to cure…which means that I will have an excuse to put this chair aside while I turn my attention to other projects…


Muscle Memory

It’s been a long time since I’ve made any serious attempts to play the piano. When I lived by myself in a small brick house on a mountainside in North Georgia, I practiced somewhat regularly. My great aunt gave me an old perpetually out-of-tune upright that sat in the living room of my painfully outdated ranch house, and when I tired of painting bedrooms and laying tile and tearing out fake wood paneling, I’d pick out a song and sit down at the piano during the evenings, trying to teach myself to play it.

I have no formal musical training, aside from a couple years of abusing the trumpet in elementary school. I definitely wouldn’t say that I can read music. It would be more accurate to say that I can interpret music, in much the same way that I can interpret French, with the assistance of Google Translate. I just see five parallel lines and an oval with a tail and think “Every…Good…Boy…Does…A-ha! That must be a D. Now I can find middle C and count down one key, and there’s the D on my keyboard!”

I never developed that instantaneous recognition of the notes and the seamless connection between my mind and my fingers that is required of a musician. Learning to play a song was a long, slow process that relied on careful practice and memorization – essentially cutting out any vestiges of consciousness and eventually getting to the point where I could rely entirely on muscle memory to play a song. I don’t recommend this method – it’s a shitty way to learn music – but I will admit that it is a very powerful way to learn one specific song. Eight years later, I can still bang out a nearly flawless rendition of the intro to “Don’t Stop Believin'” whenever I sit in front of the piano.

I noticed an interesting phenomenon when I would teach myself in this manner. I’d practice for a couple of hours, making quick improvement but still fumbling through the difficult parts. Eventually, I would reach a plateau during that session, and any further attempts to push on would only result in regression. Reaching that point was my cue to stop.

The next day, I would sit down to play, and often my fingers would nimbly execute the parts that had given me trouble the day before. There was always a finite limit to the amount of progress I could make in a single session, but it seemed that a period of rest allowed my mind to subconsciously tweak its instructions to my hands and fingers to the extent that I often made more progress between practice sessions than within them. It was a strange, but reliable, phenomenon.

In general, I don’t know that this insight relates very well to woodworking. Unlike playing the piano (or any instrument), most woodworking processes are not inherently driven by tempo. If I’m planing a board, I can plane quickly or slowly – it only matters that the plane has enough inertia to plow through the cut. I can stop at any moment to check the board for straightness or twist, or to sharpen the iron, or to modify the cutting depth. Same with a handsaw. If I note that the saw is veering off course, I simply slow down, adjust my grip, or maybe change saws. As a hobbyist, time is not of the essence; results are.

For sure, frequent practice to build muscle memory plays an important role in your speed and efficiency as a woodworker, but the nature of our craft means that even the greenest amateur can achieve stunning results if they proceed slowly, with patience and attention.

In much the same way, I could easily play Chopin, if there were no requirement that I hit the keys with the proper cadence. I’d simply take a few seconds to ensure each note I strike is the correct one, and suddenly I’m a concert pianist, right? Of course, that’s not how music works (fortunately for the audience), but it’s not a completely inaccurate analogy for woodworking. The finished masterpiece is not time-dependent; all that you see is the culmination of hard-won proficiency and patient exertion. Greater proficiency requires less exertion, and vice versa, to achieve the same effect. How much of each factored into the piece can be difficult to quantify ex post facto.

I’m certain there are many exceptions to this dichotomy, but one that has become clearer to me in the last six months – around the time I began building Windsor chairs – is woodturning. Unlike many hand-tool processes, the rhythm of lathe work is strictly enforced by the spinning wood. This remains true regardless of whether the radial velocity is imparted by a tether attached to a foot pedal, or (as with my lathe) some distant coal-hungry generator attached to a diminishing series of metallic wires.

Attempt to violate the rhythm, and your work will suffer. When rolling a bead with a skew chisel (the hardest single process in turning a chair leg), the handle starts low and gets raised; the tool is rotated along its longitudinal axis; and the entire tool is slid along the tool rest. All at the same time, with precisely correct coordination of the movements. If ever there were a time-dependent process in woodworking, this is it.

I’m not sure that it’s possible to understand the complexity of this procedure if you’ve never attempted it, but Curtis Buchanan’s video above does an excellent job of breaking down the individual steps. The consequences of failure, depending on how you go about failing, can be as simple as cutting an ugly bead instead of a beautiful one, or as sudden and dramatic as a snake-bite when the edge suddenly catches the wood and slams it into the toolrest. (And that’s happened to me more often than I care to remember.)

fanback turning
Curtis Buchanan baluster leg detail

With woodturning, practice is more than just a useful thing that will help you accomplish your work more quickly in the future – it is prerequisite to the ability to even accomplish the work in the first place. I’m not saying that it isn’t possible for a beginner to walk up to the lathe and manhandle a length of maple into a familiar shape, but I am saying that you can’t simply scrape and sand your way to perfection. The difference between the work of a master is conspicuously different from the work of the less practiced hand. The fairness of the curves, the cripsness of the fillets, the proportions of the major and minor dimensions, and the way that the shapes relate to one another – to the critical eye, there is no way to feign mastery of these virtues. And I am far from a master.

So, on Monday, I walked into my workshop and fired up the lathe. I turned one leg in just over an hour. The second leg was going well enough, until I cut the cove 1/8″ too thin. (I broke that one in half – not in anger or frustration, but just so I wasn’t tempted to actually used it.) And the third leg took even longer than the first, maybe an hour and a half. With midnight approaching, I turned in for the night, a bit dismayed that I had regressed in the intervening month since I completed the last chair.

Then on Tuesday, I reeled off two more legs, each better than the first two, in 35 minutes apiece. It felt good to see real progress after a hitting a plateau the night before. It felt familiar.

Perhaps, with enough practice, my hands will simply remember what to do without the refresher. Perhaps one day I’ll be able to walk up to my lathe and crank out a baluster leg in 15 minutes. Perhaps, when that day comes, I’ll find a piano and play a little Journey to celebrate. You know, if I still can.

The Finished High Chair

I took a couple of evenings earlier this week to get the continuous-arm high chair finished up. I was pretty dissatisfied with the effect of the black milk paint on my chair from last fall, so I decided to go back to where I began. A couple of years ago, I bought a cheap, falling-apart factory-made Windsor chair from an “antique” store in Mississippi. I took it completely apart and re-shaped every one of the ill-conceived parts into a more pleasing and historically sympathetic form. Upon re-assembly and finishing, the chair immediately became one of my favorites and has graced our dining room table ever since.

On that chair, I used homemade red milk paint as the base coat using red iron oxide as the pigment. That paint turned out lovely. I then tried to concoct some black milk paint using powdered charcoal as pigment. I may as well have painted it with dirty dishwater. The milk paint didn’t have enough substance to provide the opacity required to achieve good coverage. Fortuitously, I found that a bit of finely powdered charcoal mixed with shellac created a lovely black paint, and the finish has held up well and aged beautifully over the past couple of years. Hence, I determined to re-create the same finish on the high chair.

With the red milk paint fully cured over the weekend, I gave it a good rubbing down with a crumpled brown paper bag to achieve a lovely low luster. I find that milk paint performs far better when allowed to cure a few days before rubbing it out. Too soon, and you’ll just wear through the finish. I don’t always have the time or the patience to wait, but three or four days is optimal.

With the milk paint readied, I proceeded to mix up my shellac paint as best as I could remember. The charcoal powder I procured some years earlier from a pyrotechnic supplier. It was dirt cheap – around $25 for 5 lbs worth – and should last me several lifetimes (if I live that long). It is not as finely ground as lampblack, a more common black pigment which can also be obtained from pyrotechnic suppliers. I sifted the charcoal through a reusable brass mesh coffee filter prior to mixing, to remove the coarser bits. A mortar and pestle would be welcome, but I don’t have one.

Tinted Shellac Supplies

I found that a ratio of 1-2 tsp. of charcoal per 1 Tbsp. of shellac (orange, 3-lb cut) made a serviceable paint. A bit of experimentation is required to achieve the proper consistency, but if you get it right, it will go on quite smoothly with a synthetic bristle brush. I use a 1-1/2″ brush for the larger surfaces and a cheap artist’s brush for the nooks, crannies, and spindles.

Tinted Shellac Applied

The finish should not be applied too thickly or it will orange-peel, just like straight shellac. But you can apply multiple thin coats in fairly quick succession. I put two coats on in one evening, then allowed it to cure overnight. You do not want to begin rubbing the shellac until it is fully cured. A Scotch-Brite pad and some judicious use of 400-grit sandpaper on some stubborn rough patches yielded a lovely smooth satin sheen.

Burnishing Tinted Shellac

Finally, I topped off the shellac with a coat of tinted oil. The finish was nothing more than a bit of charcoal powder mixed with boiled linseed oil. To be truthful, I should have skipped the tinting altogether. The charcoal did not seem to add any coverage to the finish – rather, it only served to make the chair messy and annoying to handle until the oil was fully cured. Next time I’ll skip the tinting and just apply pure BLO or a thin wiping varnish.

Tinted Linseed Oil

I can’t say that the finish is perfect. There are some spots that are too thick, and some rough patches that I simply ran out of the will to smooth. But I can say with certainty that it is the best finish I have achieved yet on any of my chairs. The new owner is equally pleased and was rather excited to eat his bowl of cereal while seated upon his new perch this morning.

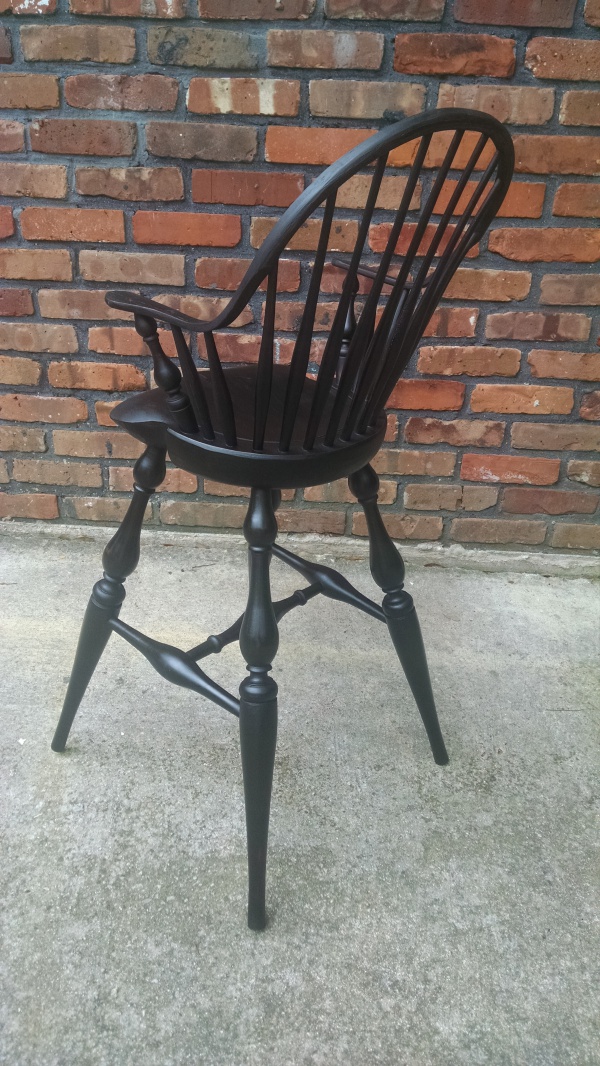
Continuous-Arm High Chair Rear Quarter View

The American Myth of the Continuous-Arm Chair

The now-ubiquitous Windsor chair has its roots in the simple, ancient stick-chairs of Great Britain. The Windsor chair is differentiated from other styles of chairs in that the seat plank serves the foundation for the entire the chair. The legs terminate in mortises below the seat, as do the spindles above the seat. Other historical forms of seating rely on the wood to serve merely as a frame for the seat, which could receive upholstery or woven reeds, bark, or cane.

Welsh stick chair
Welsh stick chair, proto-Windsor chair.

The stick chair evolved into what we would recognize today as a “Windsor” chair in England in the early 18th century, and the form was soon exported to colonial America, where the chair grew in popularity to become the dominant form of seating. From its humble beginnings, the Windsor chair evolved into a dizzying array of different forms throughout the 18th century – all of them originating in Great Britain before making their way across the Atlantic – with innovation continuing on into the early 19th century.

Though there is a fair amount of variation in the arrangement of legs and stretchers below the seat, chairs are typically classified according to what’s going on above the seat. For a solid primer on the different styles of Windsor chairs in the 18th century, I would suggest this article by Nancy Goyne Evans, the woman who wrote the book on American Windsor chairs (literally).

One of the last styles to be developed during the 18th century is also one of my personal favorites – the continuous-arm. According to Evans, “Regarded today as a classic in Windsor design, the continuous-bow chair was developed in New York City about 1790. The sweeping profile of the bow is based on the French bergère chair, examples of which were produced at this date by local cabinetmakers. This is the only eighteenth-century Windsor pattern based on a non-English prototype, and it is the only Windsor design dating before 1810 introduced to the American market in a place other than Philadelphia.

Given that Evans is such a widely respected authority on Windsor chairs, this statement has apparently carried some weight in the chairmaking community, because it is frequently repeated by chairmakers today. Witness Elia Bizarri’s remarks to Roy Underhill at around minute 1:20 in this video.

In fact, some have even taken it a step farther than simply stating the design originated in America; chairmaker Bob Dillon states on his website that the chair was “uniquely American, never appearing in Europe.”

And finally, some folks are frankly just somewhere out in left field with regard to this topic. Thomas Moser is undoubtedly a legend in the cabinetmaking community, but his website’s statement regarding the continuous-arm chair is more than a little suspect: “In about 1750, Rhode Island cabinetmakers came up with the idea of making the arm and the back of the chair from a single piece of hickory or ash, two types of wood that lend themselves to being steam bent and curved. While undoubtedly beautiful and comfortable, the Continuous Arm Chair took tremendous skill and patience to make, because of the need to form a compound curve with right angle bends.

I don’t believe there’s a shred of documentary evidence that points to a Rhode Island origin for this style, and certainly not as early as 1750. But let’s return Goyne’s statement that the continuous-arm is a uniquely American form. Observe these two chairs originating from the tiny town of Yealmpton, England:

Yealmpton

Looks very much like a continuous-arm to me.These chairs were recently sold at auction, being described as “Iconic Pair of ‘Yealmpton’ Continuous Arm Windsor Chairs”. I must thank the pseudonymous “Jack Plane” over at the fantastic blog Pegs and Tails for bringing this obscure style to my attention. He included a picture of the chairs in a post on English Windsors back on February 24 with the following description: “The chairs in figure 10 are of an egregious style peculiar to the town of Yealmpton in Devon which – whether for reasons of relative geographical isolation… or taste – thankfully didn’t pervade the country at large.

Personally, I find the chairs quite charming, if a bit peculiar. I would assume that Jack’s objection to the pictured chairs stems primarily from the regressive style of the turnings and the somewhat overstated radial splay of the the over-sized spindles. They look almost like the spokes of a wheel compared to the more subtle splay of conventional Windsor chairs. I certainly find no fault with the design of the continuous-arm, which almost looks as though it could be plucked from these chairs and placed onto a New York continuous-arm and hardly a soul would notice.

A quick Google search will confirm that, indeed, this style of chair is well-associated with the history of Yealmpton, which begs the question: which came first? The styles are simply too similar to have evolved independently of one another. The earliest American continuous-arms date from around 1790. In the comments on his blog, Jack states that the “Yealmpton chairs were in production prior to 1780“. If true, it means that the continuous-arm Windsor chair, rather than being the invention of some ingenious American chairmaker, is just another style imported from England, like all the rest.

(For the curious: I tried to do a bit of research on the topic myself, but frankly I’m at a loss as to where to even begin. The history of English antiques is very much a foreign topic to me. So instead I asked Jack himself – a former antiques dealer – if he knew of any primary sources supported the pre-1780 origin of the style. He said that his reference books were packed away at the moment, but that he intends to follow up on the topic himself. So keep an eye on his blog if you’re interested in a firmer conclusion to this saga.)

Even if further evidence demonstrates that the style did originate in the Old Country, that doesn’t mean that American chairmakers should feel any less pride in our chairmaking heritage. After all, unlike the rather unsophisticated, stump-legged chairs from the southern coast of England, the New York continuous-arm is an enduring icon: a refined symbol of good taste, comfort, and durability.

Indulging My Masochistic Tendencies with More Milk Paint

Stumpy Feet

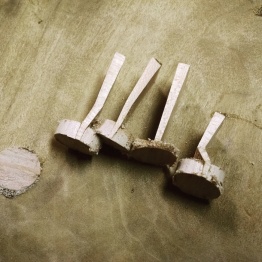
One thing about my chair that caught some attention when I posted pictures on Instagram was the stumpy nubs on the feet. To answer any questions that may have popped into your head: no, I’m not planning on leaving the stumps. I just prefer to keep those on until after assembling the undercarriage. This allows me to pop them back on the lathe to turn the tapered tenons that pierce the seat after they’ve had a chance to super-dry in the kiln.

In this case, I was very glad I didn’t cut the stumps off prematurely. Elia Bizzarri had suggested 22″ legs for the high chair. I ended making them 23″ long (plus the ~1.5″ stumps) just to make sure they’d be long enough. Well, after assembling the chair, my wife wisely suggested that we put it in front of the table with my son in it, so I would know how much to cut off. Turns out, if I had cut the stumps off as I had planned, the chair would have been uncomfortably short for him. Dodged a bullet there, but now I had to turn the stumps flush with the feet, and it was a *bit* too late to put them onto the lathe again.

So, on to Plan B:

Split leg stumps
Split off as much as I dared…
Shaved leg stumps
Shave the remainder flush with a drawknife and spokeshave…
Sanding leg stumps
And sand to smooth them out.
Tippy toes windsor chair
Now I’m left with much more normal-looking feet.

And with that, the chair was ready for a finish. If you’ll recall, I got rather frustrated using milk paint on the Tavern Table and decided to experiment with some alternatives – namely, oil paint and tinted shellac – in the future. I still plan to do just that, but since I still have a hundred bucks’ worth of milk paint laying around the shop, I figured it would be prudent to press on and try to make peace with it.

I mixed up some Barn Red from Old-Fashioned Milk Paint, using 4 tbsp of powder to 8 tbsp warm water. I let the mixture sit for an hour or so and double-filtered it with cheese cloth. It started going on just beautifully – a smooth, thin coat, more like ink than like paint. But some some reason, after about 30 minutes (it takes me 45 minutes to an hour to paint a chair, by the way) the mixture started foaming up for no apparent reason. There were no bubbles in the mixture, yet as soon as I brushed it on, it would look like this:

Milk Paint Bubbles
Just a few small bubbles in the finish – nothing to worry about…

But as I brushed the coat to smooth it and spread it, it just worked itself up into a foamy, lathery mess, like this:

Milk Paint Foam
Yuck. This is one of the reasons I swore off milk paint in the first place.

There was nothing I could do. I tried adding some more water to the mix, but that didn’t help. No amount of stirring made a difference. It was annoying and disappointing. Luckily, after about 5 minutes of drying, I found that I could go back over the bubbly areas with a semi-dry brush and smooth them down. The most egregious spots were in the crevices around the turnings, where the bubbles seemed to accumulate the most.

In the end, I was able to smooth the finish to an acceptable degree, and I think it will look reasonably good after burnishing with a bit of brown paper. Still more effort than I think a good finish should require. If I’m not pleased with the appearance after burnishing, I’ll give the milk paint a coat of red oxide oil paint to even it out some more. My wife is liking the red color, so we may just leave it solid red rather than proceeding with a black topcoat, as I’ve done in the past.

Red Continuous Arm High Chair II


It’s pretty, but it’s still 3 A.M.

I’ve said it before, but I’ll say it again: Steam-bending is one of the most satisfying processes in all of woodworking. There is something uniquely rewarding about taking a green log, splitting and shaving it to reveal a stiff, straight stave, then magically transforming it into a bendy, pliable thing that conforms to a sinuous shape upon your command – all within the span of a few hours. Amazing. (I wrote about my dirt-cheap steam-bending rig here, by the way.)

The stock that I chose for this chair’s continuous arm rail was apparently very good, because I didn’t experience so much as a single lifted fiber. After a week of air-drying and a couple of days in the kiln, the arm rail was set and I was ready to finish off the spindles.

Shaving spindles is meditative work for me. I quite enjoy the predictable nature of the way the riven oak works with the spokeshave. No reversing grain, no hidden knots. Just shave the bottom and the top tenons round and to the proper dimensions, then shape a symmetrical, gently arcing swell in the middle. Shave, test fit, shave some more, re-test, until you finally get a nice, tight fit into the mortises. It’s quite easy to overdo it and get the tenons just a hair too thin, so concentration is required. Fortunately, I had two trusty shop helpers who were making sure that I maintained focus at all times.

Kids Spindles Continuous Arm
I may have shaved a couple of spindles too thin, but I still can’t figure out why…

Soon enough, I had 13 spindles plus the two turned arm stumps fitted nicely into the seat.Once that was accomplished, it was followed by a painstaking process of measuring and drilling the arm rail, then sawing and shaving the spindles some more so that they all fit properly into the arm rail.

Many hours later, it was finally time for glue-up. This was my first continuous-arm, but I had done enough dry-fitting to predict that it would not be a pretty process. My prediction was, predictably, correct. There were 15 holes in the arm rail, with 15 corresponding spindles that all had to be seated simultaneously, and in the proper position. Then all 15 spindles needed to be split and wedged to clench them irreversibly tight. Everything came together as planned, but I was not masochistic enough to attempt to video-tape that process.

At some point that night, a bleary-eyed wife wandered into my shop and rather gruffly informed me that it was 3 AM. I had just finished shaving the spindle tips flush at this moment, so I proudly stepped aside to display my meticulously wrought creation. “It’s pretty,” she said flatly, “but it’s still 3 AM.”

Then I remembered that I had forgotten to consult my handy graph for the appropriate hours during which to present my work to my wife:

Impressiveness by time of day

Oh well. I snapped one last picture and turned in for the night.

Assembled continuous arm


Georgia on My Mind

Over the Easter weekend, I ventured to Colbert, Georgia to visit my family and to find the rest of the wood that I’ll need for the high chair. My parent’s homeplace is a sanctuary for the wood-lover. A mature pine and oak forest occupies most of the property, and nested within it are barns filled woodworking equipment, chainsaws, a sawmill,and a tractor with a front-end loader. Fields on both sides of the barns accommodate meticulously-stacked lumber and logs of all types that are ready to meet the same fate. Besides my home, there is probably no place else where I feel more ‘at home’.

My goal on this visit was finding a nice white oak log to provide bending stock for the continuous-arm rail and the spindles. My Dad certainly has no shortage of nice white oak logs. These beauties are bound for Kentucky to become whiskey barrels:

White Oak Logs
Hard to believe they can pay for logs in Georgia, ship them to Kentucky, and still make a profit. Must be good money in whiskey barrels…or at least in whiskey.

No worries, though; there was still plenty of stock to choose from. Besides, these logs had rings that were a bit tighter than I would prefer for bending stock. It is often assumed that faster-grown trees will yield weaker wood, but as I’ve said before, most often that is not the case. With ring-porous species like oak, faster growth actually yields stronger wood, which makes for better bending stock since the wood is less likely to splinter during tight bends.

White Oak Slow Grown
The whiskey-barrel logs had fairly tight growth rings: around 1/16-1/8″.
White Oak Fast Grown
The wood I selected grew much faster: growth rings were from 1/4″-3/8″ or more.

The downside of faster-grown stock is that the sapwood band will be much wider. My log had a sapwood band 2-1/2″ wide, compared to about a 1″ band in the whiskey-barrel logs. There’s nothing inherently wrong with the sapwood, but it begins to decay in a matter of weeks, versus years for the heartwood. Luckily, my log is very fresh and the sapwood will be fine to use.

In addition to wide growth rings, there was one more compelling reason for choosing the log that I chose. It was already split in half! My Dad is an experienced feller, but he had a slight mishap as this tree fell. A large branch on this tree caught a neighboring tree as it was falling, causing this one to twist on the hinge and splitting it for twenty feet up the trunk.

Split White Oak Log

I believe there may have been an impolite word uttered when the mishap occurred, but it was good news for me. I now had an entire log to choose my stock from, and it was already split in half! The first split is always the hardest, and it gets even harder as the log gets longer. Having a pre-split log not only reduces the work, but also allows me to place my cuts more strategically, since I can already see where the major defects are. It’s almost as good as X-ray goggles!

First things first: I needed a 40″ blank for the high chair’s arm rail. A full-size continuous-arm chair needs a 60″ blank, so I decided to go ahead and cut a 5′ section so I will have the wood I need on hand when I’m ready to build a full-size chair.

Sawing White Oak
My dad has always been a stickler for safety equipment, as you can see…

Having an ample number of wedges on hand made quick work of splitting out my arm rails.

Splitting White Oak

I also had plenty of nieces around to help out.

Splitting Helpers
Favorite quote of the day: “This doesn’t look like a chair.”

Finally, I cut some shorter bolts for spindles. I truly don’t believe I’ve ever seen a nicer-splitting white oak log. At least in the Deep South, white oak tends to be far more difficult to split than red oak, with lots of tenacious interlocking fibers on the radial faces and infuriating runout when splitting the tangential faces. No such problems with this log. A single wedge easily split this large bolt without complaint.

Splitting White Oak Bolts

In less than an hour, I had enough stock split out for at least five more chairs.

Riven Wood

I brought my stock into the forested shade and went to work with the drawknife. I do believe I had the best seat in the house.

Shaving Spindles


A Windsor High Chair

My wife and I have this conversation nearly every time I finish a furniture piece. I ask if there’s anything she wants me to build before I start my next project. Secretly, I’m always hoping that there’s nothing in particular that she wants so that I can pursue whatever suits my fancy. But there’s pretty much always something in particular that she wants. My obligation, so as not to seem neglectful, is to first build this particular thing prior to moving on to other projects that are tugging at my spirit. It is a rare and fortuitous event, indeed, when what I am asked to build is precisely what I would like to build, but such is the case with my latest project.

A high chair. A Windsor high chair, to be exact. A continuous-arm Windsor high chair, to be pedantic. (Those last two specifications are of my own preference. I was only asked to build a high chair.)

You can buy Windsor chair plans for lots of different types of chairs: fan-backs, comb-backs, loop-backs, balloon-backs, sack-backs,  and continuous-arms. With or without rockers. But where do you get a plan for a high chair? Heck if I know.

Although I reject published plans for the majority of my furniture, I am not quite at the point where I would feel comfortable designing a Windsor chair. They are complicated little sons-of-guns. I implored chairmaker Elia Bizzarri for help. His suggestion?

You can take Curtis Buchanan’s Continuous Arm or Comb Back plans and reduce the seat and back to 2/3 scale. The legs are 22″ long and the diameters are the same as the full size chair. Rear leg angles (into the seat) are 22 degrees and the sight line runs through a point on the CL 3.5″ from the front of the seat. Front legs are at 15 degrees, sighted at a point on the CL 5″ back from the front of the seat.

That may sound like gibberish to someone unfamiliar with the language of Windsor chairs, but it was all I needed. The good news is that I already had Curtis Buchanan’s continuous-arm plans as a Christmas present from my in-laws. Scaling them down was as simple as setting up the copier at work to 67%, and off I went.

Since I had no wood at the moment that would be suitable for the arm rail, it made sense to start with the undercarriage. First up was the legs. At 22″ long, these required a bit of scaling, as a normal chair leg is 18″ long. I found that the best appearance was gained by extending the balusters (the vase-shaped part in the middle) and the foot, and leaving the rest of the details (coves, beads, and birds-beaks) unchanged.

Optimized-High Chair 030 (1)

With those done, I turned my sights to the seat. The full-size seat is 18.5″ wide, but at 2/3 scale, I only needed a board a little over 12″ wide. Easy enough to find. I left the thickness at 2″, since I reasoned that the additional thickness will give greater purchase for the leg-to-seat joinery.

The carving process is identical to the last Windsor chair: First, flatten and thickness the board, then lay out and drill all of the holes for the legs and spindles, then carve and shape the seat.

I labored on my first Windsor chair seat for a few days, trying to understand the shape and making sure everything was just right. This one was done in a matter of hours. It’s amazing how much more quickly the work can proceed once you have the end goal firmly planted in your mind. I was not as timid to waste away the unnecessary material, because it was now immediately obvious to me which material was unnecessary.

Finally, I reamed the leg holes and made a few wedges, and the undercarriage was ready for assembly.


With that done, it was time to start on the spindles and the arm rail. Since no suitable wood grows on my little island on the Florida coast, that will require a road trip. Luckily, my dad lives in Colbert, Georgia, in the midst of the oak-hickory region. Even more luckily, he owns a small sawmilling operation, and white oak just happens to be his specialty…

Easter 2016 026

Final thoughts on my first Windsor chair.

That’s a wrap. The chair is in the books. Last weekend, I burnished the last coat of black milk paint and oiled the chair with walnut oil. I may yet go over it with a few more coats of oil, because the finish is a bit duller than I’d like, but that won’t change the appearance much except to add a bit more shine. Last night, I got out an old white table cloth and my wife’s SLR and tried to take a few decent pictures. Hopefully they prove that I am at least as good at building chairs as I am lousy at taking pictures of them. Thanks to everyone who followed along and offered encouragement and kind words. And thanks especially to Peter Galbert (author of Chairmaker’s Notebook and the Chairnotes blog) and to Curtis Buchanan (creator of tthis awesome YouTube series on Windsor Chairmaking). I defintely couldn’t have done this without their help.

I’ve never tackled a project that required so much patience, research, and preparation before. I am prone to dive headfirst into a project, even a big one, with the assumption that I can just figure things out at I go along. Usually it works out fine. Occasionally it ends in frustration. There have been a few points over the last few years where I’ve walked out of the shop with a half-finished project and refused to go back in for weeks or months. Or at the very least, I’ve put aside a project and continued on with other things, sometimes for years, until my tools or skills caught up to my original vision. I can’t think of many things that breed negative emotion quite like the sight of a half-finished project mocking me every time I walk into what is supposed to be my happy place, my temple, my cozy respite from the rest of the world. I know that feeling too well, and I’m glad that, in this instance, I knew better than to tackle this project until I knew I was prepared. There is nothing quite like the enthusiasm of youth, but I’m hoping this project marks the wisdom of age beginning to take hold.

I’ll leave you with a few picture of my new favorite thing:

Fanback Angle

Fanback Comb

Fanback Post Detail

Fanback Side Seat

Fanback Front Seat

Fanback Leg Detail

Fanback Rear Seat

Fanback Rear