Song lyrics were running through my head as I rubbed down the final coat of lacquer on Sunday morning:
Down with the shine, the perfect shine, That poisons the well, and ruins my mind, I get took for a ride every time, Down with the glistening shine.
The Avett Brothers are right. Aerosol lacquer leaves a nearly perfect finish straight from the can, but even the “satin” finish is too shiny for my taste. To tone down that glistening shine, I prefer to rub it out with a green synthetic steel wool (Scotch-Brite) pad. You can use real steel wool, but it’s annoying because it disintegrates and leaves a mess.
BeforeAfter
In addition to to reducing the plastic-y look that lacquer can give (not as bad as polyurethane though), rubbing out the finish vastly improves its tactile qualities. The fingers can easily see what your eyes can’t.
Unlike sandpaper, which always needs to be used with the grain when sanding the finish, the Scotch-Brite pad can be rubbed in a circular pattern. If you’re really feeling like a rebel, they attach quite nicely to the Velcro of a random orbit sander.
The final step is a coat of paste wax. I’ve had one can that I’ve been using for at least 8 years, and it’s still not close to halfway gone. Paste wax brings back just a hint of shine, adds a bit of water-proofing, and further improves the smooth, tactile awesomeness of the finish. Rub it on lightly with a cotton rag, let it dry for about 10 minutes, and buff it off with a clean cloth.
The layers of finish will continue to cure and harden for at least a month after the final coat is applied. I try to treat my furniture gingerly for a while after I bring it inside – we’ll see how well that works for a kitchen table in a house with two young kids.
After the paste wax was done, the table was ready leave my shop. Cue the next verse:
It’s in with the new, and out with the old, Out goes the warm, and in comes the cold, It’s the most predictable story told, In with the young, out with the old.
The old table was certainly warm and well-used.
Complete with glitter paint:
And watercolors:
And plenty of dents and dings:
My daughter was actually crying as I disassembled it to store in the attic. Fortunately, her sadness quickly shifted to delight as I brought the new table in and began to set it up. Unlike the old table, which overwhelmed the small space and made it difficult for two people to move around in the kitchen, the new table fits the space perfectly.
Let’s just pretend that this is an attractive, modern showroom and not the outdated kitchen of 40-year-old rental house, shall we?
When I began the project, I was mostly excited that I had a kitchen table design that would be quick and easy to build so I could move on to other projects. Now that it’s finished, I have to say that I couldn’t be more pleased with the outcome. I think the table looks modern, but not avant-garde. It goes nicely with our motley collection of kitchen chairs. We feel more like a family as we sit around this table, all facing one another and within an arm’s reach, rather than stretched out across a too-big table. It just feels right. And that’s a good feeling.
If you’d like to follow the whole series of posts on designing and building this table, you can click here and start at the bottom.
If there’s one part of woodworking that I’d just as soon do without, it’s the finishing. Something tells me I’m not alone in this regard. I can easily get into “the zone” when cutting joinery or planing or carving where the time seems to pass without notice, but for some reason that never seems to happen during the finishing process – I very much notice the time, and there’s a part of me that dreads it. It’s not really that I’m worried about messing up the piece. That used to be a concern early on, but I’ve worked out some reliable processes that have been pretty fool-proof.
Well, the time has come to give this table a finish – I can’t put it off any longer. I started a couple of days ago with a good rubbing of tung oil. I use real, 100% tung oil, not the “Tung Oil Finish” that they sell at the hardware store that’s actually a wiping varnish that doesn’t contain any actual tung oil. I bought it from Woodcraft, one bottle goes a long way.
There is nothing magical about tung oil, and you can use most any drying oil to get the same results. I used to used boiled linseed oil, which dries very quickly (for an oil) and looks pretty much the same once it’s on the wood, but I’ve grown wary of the chemicals in it that enhance the drying. It’s probably fine, but it annoys me that manufacturers won’t say what’s actually in it. All I know is that it contains “metallic dryers”. They don’t use lead any more, but what do they use? So anyway, I’ve switched to tung oil for now. Real tung oil is slow to dry, much slower than boiled linseed oil. I left this bottle in the window for probably a year – the sunlight helps catalyze the cross-linking process that results in a hard finish. It’s noticeably thicker now than it was when I bought it.
Wiping with oil is the one part of the finishing process that I don’t mind – actually, it’s one of the best parts of woodworking. There’s nothing like seeing the fine glow first appear when the oil hits the wood.
After a couple of days of drying, the less-fun parts must commence. I lay out the pieces and start with some aerosol shellac. I used to brush shellac, which can leave a beautiful finish if you’re careful, but it’s a pain in the ass to clean up your brushes. Plus, the solvent is denatured alcohol, which doesn’t come cheap. It’s even more expensive if you want to avoid the denaturing chemicals and use Everclear instead. You can’t use disposable brushes, either. Brushed shellac demands high-quality (read: expensive) brushes, there is no alternative.
I have to say, the primary benefit of aerosol finishes is the complete elimination of solvents and brushes. They’re half the cost of your finishing materials. I don’t ever consider brushing film finishes any more, and the thought of having to clean and maintain an HVLP system gives me nightmares and cold sweats. So, aerosol it is for me. I really don’t see this as a cop-out, though: I can achieve a finish with aerosol sprays that rivals anything I’ve seen in fancy studio furniture. Most of the effect of a fine finish comes through rubbing it out after it’s applied, not the application process itself.
The top and legs both got two coats of shellac. Shellac is fast-drying – you can re-coat within 10 minutes on a sunny day. You have to be careful not to overdo it, though. Shellac doesn’t have the same surface tension as more modern film finishes, like polyurethane and lacquer. That means that if you over-spray a vertical surface, you’re very likely to get runs in the finish. It’s also susceptible to “orange peel” effect if you over-spray a horizontal surface.
After a day of drying, the shellac is fully-cured, and I’ll rub it out with some 320-grit sandpaper and a cork sanding block. This will leave a wonderfully smooth surface for the final coats. I use aerosol lacquer for the topcoat. I used to use a Deft satin lacquer, which was cheap (around $6/can) and could be purchased at Home Depot. I noticed that Home Depot has done away with the Deft brand and replaced it with some Minwax lacquer. They also upped the price to $9/can, the bastards. The Deft lacquer was an incredible finish, durable, easy to apply, it went on beautifully straight from the can, and it dried so fast that it was almost impossible to over-apply. Once you went ’round your furniture one time, you could start right back again. I have no experience with the Minwax product, but I’m going to be pissed if it’s not a full 50% better, given the price.
After supper, I brought the pieces back into my shop to install the battens on the underside. I know fully well that this tabletop will shrink by a lot when I bring it inside. My shop is humid and wood can scarcely get below 12% moisture content in there. It’s never been a problem, though – just accept that your wood is going to move and makes plans to accommodate it. I drilled elongated holes in my battens and screwed them on with panhead screws and washers.
I’ll probably not worry with a film finish on the underside of the table. A good coat of oil is all she’ll get.
I’m so excited to get this table into my kitchen I can hardly stand it. Honestly, I think that’s one of my problems with finishing. The furniture is built, and I’m over-eager to put the thing to use, so I’m prone to rush things. That’s bad news for a good finish – it takes time, and there’s not much you can do to hasten the process. I have learn to take a deep breath and take my time, just like I do with the rest of the furniture-making process.
So, do I win the award the award for the most objectionable blog post title ever?
What? There’s no award? What a waste.
Well, anyway, one of my dear readers (and you are dear, trust me, I can count you on my fingers and toes) asked me about how I located the peg holes on the underside of the top of my sassafras kitchen table (from this post). The intuitive way would be to flip the table upside-down and set the base on top, then push it around until the distance from the point atop the legs to the nearest edge of the tabletop is equivalent for each leg.
The tops of the legs form an equilateral triangle. Your mission, should you choose to accept it, is to mark the corners of a congruent triangle that is precisely centered on the underside of the tabletop.
That would work, I suppose, but it would be finicky and prone to error. As my reader surmised, there is indeed an easier, more precise, more elegant way. First, we just need to envision that the top corners of the three legs form an equilateral triangle. The length of the sides is easy enough to measure. In this case, it was 28.75″ precisely.
Let’s call the length of the side (x). If you recall from high school geometry, there is a fixed relationship between the length of the sides of an equilateral triangle and the radius of a circle – we’ll refer to the radius as (y) – that passes through all three corners (i.e., a circumscribed circle).
That relationship is: y = x (√3) ÷ 3
Mmm…numbers. For the record: No, I didn’t remember this formula. I had to look it up.
So, we just plug in 28.75 for (x) and we get 16.598820…Let’s call it 16.6″. I don’t have a ruler that’s marked in tenths of an inch, so I just used 16 38/64 (16.594″). I adjusted my trammel to the radius and scribed a circle on the on the underside of the table (you can see it on the picture above).
Okay, now we have a circle of the proper radius that is perfectly concentric to the edge of the table, but we still need to accurately locate the three corners of the triangle. Well, that’s dead-simple now that we have a trammel set to the radius. Just pick a point on the perimeter and start “walking” the trammel around the perimeter, making a mark at each intersection. You should end up at the same point that you started at (or very close to it) with six equally spaced marks around the circumference of the circle, forming a perfect hexagon. Drill a hole in every other point, and there you have your perfect equilateral triangle.
Mathematical constants are fun and useful!
So there you have it. Hopefully I made the process tolerably clear – it took far longer to write about it than it did to actually complete it.
Last night I resolved to get the kitchen table out of my shop as soon as possible. I forget how unwieldy a 4′ x 4′ panel can be in a small shop like mine. Glad I don’t work with plywood in there. The last of the glue joints still needed to be leveled, and there isn’t a single surface anywhere in my shop (or home, for that matter) large enough to support a panel this size aside from the floor. So the floor is where I ended up – on my hands and knees with a jack plane and my smoother. It reminded me of the first furniture project I ever tackled – a cherry and maple coffee table. I sanded the fool out of that tabletop for hours on the floor of the side porch at my parents’ house. My knees regretted it for a week, so the second piece of furniture I built was my workbench (which now resides in my Dad’s shop).
Working on the floor. Just like old times.
This time it wasn’t so bad, though. It only took 5 minutes of work and the planing was done. If you’ve never used a well-tuned plane, it’s hard to imagine how much more efficient it is at leveling glue joints than a sander.
Next task was to lay out the circle. I didn’t have a paint can big enough so I grabbed an offcut from the scrap pile and rigged up a trammel with a nail, a pencil, and a small wedge. It took two minutes and worked perfectly, so I still feel no need to own a proper trammel.
Not every tool has to be built to last.
I cut out the circle with my jigsaw. Hope you didn’t think I was a complete Neanderthal. I have nothing against power tools – most of them have their proper place. I only get annoyed when I see power tools being inefficiently or as a substitute for basic skills. I do prefer to use hand tools when possible – they’re quieter and less dusty and they require actual exercise – so when a process can be done equally well with hand tools, that will always be my first choice. In this case, a jigsaw is the right tool for the job.
Notice the offcut is supported only by the 1/4″ glue joint at the top of the photo. That’s a good glue joint. Just sayin’.
I smoothed the edges with a spokeshave and some 180-grit sandpaper and propped it up on the legs to see how she looked. Not bad!
One of the shortcomings of the design for the base is that, unlike vertical legs, these legs will always be under tensile stress. Wood is far stronger under compression than tension. To help alleviate some of the stress, I decided it would be wise to affix the legs to the underside of the top to prevent them from bending.
I did this by boring a 1/2″ hole in the top of each leg and 3 matching holes in the underside of the top. I turned some 1/2″ dowel from Osage-orange and popped a short length into each leg. Now the base is fixed when the top is in place and can’t just keep squatting towards the floor as weight is applied.
All that’s left to do now is screw a couple of battens to the underside to hold the top flat, and put a finish on it. This grain is going to pop when I put the first coat of oil on – I can’t wait!
Previously, I wrote about the dead-simple half-lap joinery for the legs. The top is nothing more than a round panel, 48″ in diameter. Easy enough, but I have a small shop, and the workbench is only two feet wide and integral to the wall. To make things easier, I started by gluing up two 24″ wide panels, each from three individual boards. I finish-planed both halves prior to the final glue-up. That’s a lot of edge joints, but if all goes well, I’ll just have a bit of cleanup right in the middle of the panel.
Gluing up a panel is one of the most basic skills in woodworking, but it’s also one that takes a fair amount of time and frustration to master. It doesn’t help that there’s metric buttload of nonsense on this topic that for some reason gets repeated ad nauseam by people who don’t know what the hell they’re talking about. I’ve fallen prey to pretty much every hare-brained theory at one point or another, so let’s get started by clearing the air:
You don’t need biscuits/dowels/Dominoes or any other silly crutches to make an edge joint that will outlast you.
It doesn’t matter how many Bessey bar clamps you own. Clamping pressure will not overcome a poorly executed joint.
Wide boards are not inherently prone to warping. Just make your lumber is dry and don’t do stupid things that are bound to cause problems, like leaving it out in the sun or laying on the wet grass.
You don’t need to alternate the direction of growth rings to prevent a wide panel from warping.
You don’t need to cut apart a wide boards so they can be flattened with your jointer and planer. You do need to learn how to use a hand plane.
Legend has it, the ghost of George Nakashima will butterfly your buttcheeks together while you sleep if you cut apart wide boards so they’ll fit your jointer and planer.
Okay, now that the unpleasant bits are out of the way, lets talk about what you really need to know to make a satisfying edge joint. First, forget about grain direction. I mean, not entirely. You still have to plane boards the right way. But since hand planes are still the ultimate tool for flattening and surfacing a wide board or panel, it’s trivial to turn the board around (or the tool – Western planes can be pulled quite nicely) to plane in the appropriate direction.
Just find a way to orient the boards so that the resulting panel is aesthetically pleasing. That usually means trying to match up the grain for a seamless joint. Or it may mean bookmatching consecutive boards, which creates a pleasant symmetry, but will always result in a panel with the grain going different directions (unless the grain is perfectly straight).
Now let’s discuss the tool you need to cut these joints. You need a jointer plane. Usually 22-24″ long, but most importantly with a well and truly flat sole. I struggled with a number of vintage planes over the years. At first, all I had was a Stanley No. 4 and a Craftsman No. 5. The 5 can do a short edge joint just fine, but not if the blade is cambered like it should be (if you’re using it primarily as a jack plane for rough surfacing). I was short on cash, so bit by bit I added tools to try to address this obvious shortcoming.
First I tried a cheap wooden jointer. The price was right, but the mouth was rank and the sole wasn’t flat. I inlaid a patch for the mouth and did a neat job of it, but unfortunately, I didn’t have a way to flatten the sole. Eventually I sold that plane and bought a Stanley No. 6. The 6 is one of my favorite planes. It’s always on my bench and it follows my 5 for face-planing. Unfortunately, the sole has a belly of a couple or a few thousandths (I haven’t measured it, I just know that it always planes a slightly concave surface). I finally realized my need for a real jointer and bought a Stanley No. 7. It was a beautiful plane. But it wasn’t flat. Not perfectly, anyway. So I bought another Stanley No. 7. And a Stanley No. 8. And a Millers Falls No. 22 (same size as a Stanley No. 7). All of them were lovely planes, and I spent a good bit of time fixing them up and sharpening the irons and tuning the chipbreakers. None of them were flat. And none of them could cut a seamless edge joint.
I really should have just bought a Veritas or Lie-Nielsen jointer from the beginning. No, they’re not cheap, but it would have saved me so much time and effort on all of those old planes. If there’s one thing that I learned from my experience, it’s this: You cannot cut a a perfect joint with a non-perfect plane. Yeah, you can get close, and I built a lot of furniture with joints that wouldn’t have closed without the help of clamps. They were close and I’m sure they will last, but I’m not happy about it. I was never happy about it.
Finally, I ended up with a vintage Stanley No. 7 that was precision-ground with a surface grinder. It’s as flat as any of my straightedges. I bought it from a old fellow at the Woodnet forums who goes by the handle “Tablesaw Tom”. I don’t know if he still hangs out over there – I haven’t been around there for a year or more. But his work is well-regarded, and for good reason.
The precision-ground No. 7 was a revelation. No more measuring, planing, re-measuring, re-planing, re-re-measuring, cursing under breath, re-re-planing, cursing out loud, throwing tools and clubbing baby seals to quell my frustration. A flat plane cuts a flat joint. The point is this: Buy the right damn plane from the beginning. Your jointer plane is absolutely one of the most important tools in your chest. It is more important that your smoothing plane and your dovetail saw and your marking gauge put together and multiplied by π. Please, I beseech you. Learn from my mistakes and not your own. Buy a good jointer plane.
Alright. You have a good jointer plane. It’s long. It’s flat. The iron is honed straight across What else? You need a try square. A straightedge. Some winding sticks. That should pretty much do it. You’re done when the try square, the straightedge, and the winding sticks all agree that it’s done.
A few tips on how I get to “done”:
I always clamp the two boards to be edge-glued together and plane them as a pair. It’s not hard to do, and it has a few benefits: The extra width makes it easier to hold the plane squarely on the joint. It also makes it easier to see when your joint is out of square. The most oft-repeated benefit is that, if your joint is not square, the errors will cancel each other out and you’ll still end up with a flat panel. I shoot for square anyway.
Set the plane to take a very fine shaving when dialing in a long joint. Almost like a smoothing plane. So it doesn’t take forever, I use my No. 6 to get the edge close, taking a fairly coarse shaving, then I true it with a finely set No. 7.
Plane both boards at once, folded like a book from the position that they will be glued in. The blade is set for a fine shaving to dial in a long joint.
I’ve read silly things about how when your jointer takes a full-width shaving along the length of your edge, that means it’s true. It’s not true. Well, your edge might be true, but the adage is not true. It’s very easy to plane a slightly convex edge without realizing it. Probably easier than planing a perfectly straight edge. So use your straightedge to see how far you are from straight, and plane the high spots. It’s often best to intentionally plane a very slight hollow, then take a couple of full-length strokes to get it straight.
There should be no light peeking in from under your straightedge. Also, make sure your straightedge is actually straight!
Same thing applies to twist. You can take a full-length shaving from an edge that twists slightly from end to end. This is where your square and winding sticks come in handy. I don’t know that I’ve ever read about someone using winding sticks for edge jointing, but I’m sure I’m not the first person to do it. It’s a bit of a belt-and-suspenders approach. If both tools agree that the edge is square and free from twist, then it probably is.
Check the edge for square frequently, and in several places. If your iron is just slightly misaligned with the sole, the edge will get more and more out of square with each stroke. If you’re taking more strokes in one area to remove a high spot, that’s a recipe for creating a twisted edge.Your winding sticks amplify inaccuracies and make any twist apparent. Since they take a moment to set up, I use my square to check the edge frequently, then set up the winding sticks only when I think I have it close.
Damn, that’s a lot of words to spill and I feel like I’ve barely even scratched the surface. This opus obviously assumes that you’re already fluent with hand tool lingo and relatively experienced at hand planing. The reason I felt the need to put it into writing is because, even though I’ve been using hand planes for 8 or 9 years, it probably took 5 years before I felt like I could reliably create a good edge joint. Hopefully this message finds its way to someone who’s facing the same struggles that I did.
tl:dr? Fine, here’s a one-paragraph summary.
1) Don’t skimp on your jointer plane. Get a good one, and consider it an investment in frustration avoidance. And 2) Don’t trust. Verify. You have measuring tools. Use them to make sure that you’re planing accurately. 3) You’re done when the boards meet so seamlessly that you feel confident the joint would hold with glue alone, no clamps.
And one more thing. I’m sure fancy bar clamps are nice to have, but I’ve never met a single panel that couldn’t be clamped with my $2 garage sale pipe clamps. Spend your money where it counts – on the plane.
In my last post, I went through the process of designing a kitchen table that will actually fit in our kitchen and still allow room for two adults to walk around one another. The material that I selected for the table was some sassafras that I had milled about three years ago.
Sassafras is a gorgeous wood for hand tool woodworking. It works like a dream and smells like dessert. The sweet-spicy aroma has permeated my shop for a couple of weeks now. I had one wide slab 3″ thick, which I sawed up for the legs, and just enough clear 4/4 material to make the top.
At this point in the build, the legs are roughly planed and square. Since the half-lap joinery demands that the legs be at their finished dimension, I went ahead and made the final passes with my smoothing plane.
Sassafras is light and soft, but a sharp plane leaves a silky finish.
After planing to the finished size, the next step is to lay out the half-lap joinery. Curiously, to have the tops and bottoms of the legs fall along the same perimeter, you don’t cut the joints in the middle of the legs, but off-center by half the width of the legs. First, I mark out the proper width on the face with a try square and a marking knife.
There was only one defect among the three legs – this knot. It fell just perfectly to be removed when I cut the joint. That’s when you know things are going your way.
Then I mark halfway through the legs along the edges with a marking gauge, and bring the marks from the face down with the saddle square.
I deepen all of my scribed lines with a wide chisel and pare out a chip to make a “track” for my saw to ride in. It’s like training wheels for your saw!
After defining the kerf with the chisel, it’s time to get sawing. I use a carcase saw to make the “money” cuts that define the edges of the half-lap, and a box store ryoba to make a few kerfs in the waste to make it easier to chisel out.
Some quick work with a chisel gets me close to the bottom.
And then I dial that sucker in to perfection with a router plane. The router place can leave a surprisingly sweet surface if you just take a light shaving on the final pass.
A nice, snug fit. Alright, two more to go!
Three legs with the joinery complete. This was about as quick and painless as table joinery ever gets!
And the moment of truth: Will the legs go together the way my Sketchup model says they will?
Spoiler alert: Yes. Yes, they will.
I can’t complain about the fit of the joints, either.
I find it worthwhile to take my time to do things right when I’m going to be looking at a joint every day for an unspecified number of years.
…to bring you a quick update on a project from the honey-do list.
My wife knows that I’m chomping at the bit to get started on Windsor chair, but she had a few requests before I get started. Numero Uno was to build a replacement for our kitchen table.
We like our kitchen table. It’s a big, beefy trestle table made from thick white pine. My grandmother bought it new in the 1960’s. It was well-built, but when I inherited it, the dark finish was gummy and depressing. I was too busy renovating a house to worry with fixing it. When my wife and I were married, one of her first requests (demands?) was to re-finish the table. We sanded it down to bare wood, painted the base with barn red milk paint, and oiled the top with linseed oil. We’ve shared many meals around this table over the last 5 years.
But, we now live in a small ranch house with a small kitchen, and the trestle table is 3′ wide and 6′ long. It’s just too big. A round table was requested, which should fit the space much better.
A table is a simple object. It can be built as quickly as you like, or you can dress it up with as much fancy joinery, carvings, or veneer as your imagination allows and it can take a year. For this project, my aim was workmanlike efficiency, but with a tolerable aesthetic appeal.
I began with a search of Google images, using a number of keywords. “Round Dining Table”. “Round Shaker Pedestal Table”. “Round Modern Dining Table”. “Round Tripod Dining Table”. “Round Modern Tripod Table”. Something like that, you get the idea. Each iteration was inspired by something that caught my eye in the previous search. I quickly latched on to one theme: a modern approach to a tripod base with the legs intersecting along X, Y, & Z axes.
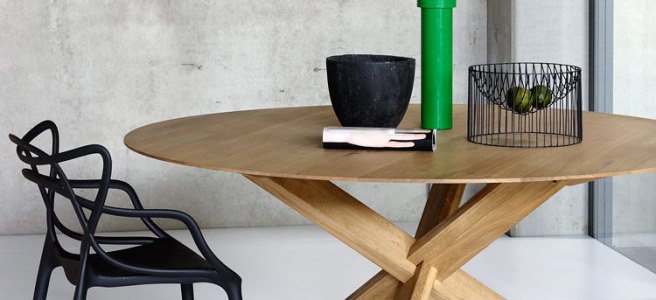
This was the first table that really caught my eye. The interlocking “puzzle-joint” makes a minimalist, but visually interesting, joint. It’s just three intersecting planks, but the mind immediately wonders how it was made.I liked this one as well. The maker chose a more interesting wood (looks like zebrawood to me) with a strong, straight grain pattern that echos the simplicity of the design. The glass top is appropriate for the alluring base, but I would like the table more if the legs actually intersected, instead of just criss-crossing alongside one another.Finally, I found another glass-topped table, but this time with a base that includes some interesting joinery.The execution is a bit loose, but I like how each beam seems to be embracing another. The wood appears to be beech.
I love geometric puzzles, and the final photo had me imagining how the joint fit together. A few minutes in Sketchup confirmed my suspicion that the basic joint was just a simple half-lap. I quickly settled on this design for the base of my table. Even though I don’t find it as visually striking as the first joint, I like the elegant simplicity of its engineering. Unlike the first joint, this one can be assembled from whole timbers, rather than cutting and gluing up at least one leg (but if anyone thinks they can demonstrate a way to create the first table’s base using whole timbers, well, good luck…)
One thing that became apparent from my work in Sketchup was that the height of the table directly impacts the diameter of the top. If you want your tabletop at 29″ high (a usual height for a dining table), then you’re going to have trouble making it much less than 48″ in diameter (and even this requires truncating the legs, such that they have squared-off ends, rather than ends that follow the plane of the floor and tabletop. Hopefully the Sketchup drawings make it clear what I mean by this).
So, I’ve settled on 48″ for the diameter of the table, but if I find that this is still too big for the space, then I can probably shave another inch off the radius without too much trouble. A bit of work in Sketchup yielded this model:
With a simple, 44″ half-lapped 3×3 as the basic component:
I can’t say that this is the prettiest or the most exciting thing I’ve ever built, but it meets the criteria that I had in mind when I originally set out to build this table: It’s visually interesting, expedient to build, and I already have the necessary materials on hand.