There is hardly anything in the world that some man cannot make a little worse and sell a little cheaper, and the people who consider price only are this man’s lawful prey.
-John Ruskin
Okay, so we established in the previous post that my new inshave is a bit of a disaster. But I’m an optimist and remain hopeful that I can turn the depressing collection of bent steel and varnished Asian hardwood into something that actually resembles a functional tool. The work begins at the grinder. First step is to take an edge that’s wavier than the Pacific coast and make it passably flat.
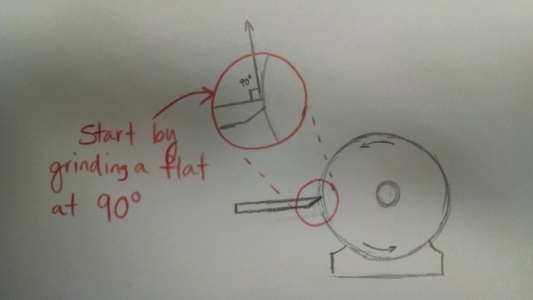
I always start any major grinding work by grinding the edge to 90°. There’s a good reason for this: you want to avoid creating a sharp edge for as long as possible, so the steel doesn’t heat up so quickly and ruin the temper. It also creates a guide and makes it easy to see where you need to focus your efforts when grinding the bevel.

You don’t need to overdo it here. Just grind the edge down until the high parts are in the same plane as the low parts.


Next, I drove a nail into my tool rest which functions as a bastardized version of the fancy-pants grinding jig that Peter Galbert wrote about a few years ago.
A quick look at the edge shows that the nail jig is located correctly. The stone is grinding right in the middle of the bevel, which will maintain the original grinding angle.
Now that the nail jig is properly located, the painstaking work of grinding the bevel begins. There is a lot of metal to remove, and a deft touch is required to avoid bluing the steel and ruining the temper. It probably took almost an hour of grinding, checking, and grinding some more until I was finally happy the the results.


The hardest part of the process was getting a smooth grind around the corners. The middle of the blade was no problem at all. I haven’t used this technique on a drawknife, but it was easy to tell that it would work beautifully on a straight edge.
Up next: I still need to polish the back of the blade and hone the bevel.


