The People Have Spoken

What good is a wooden eating spoon?

If you ask the people who frequented my Etsy shop since its inauguration two weeks ago, not much. So far among the tally of items sold: cooking/serving spoons – 10, eating spoons – 0.

Redbay eating spoon.

It’s a bit of a shock to the system for an old spoon carver like myself. I’ve surrounded myself with an Instagram feed and Facebook Groups that include a daily abundance of carved spoons. I’d estimate that 90% or more of the spoons that I see on social media are eating spoons.

It makes sense if you’re a carver. Cooking and serving spoons are big. They take at least two or three times as long to carve as an eating spoon, and they take up a commensurate quantity of space in the kitchen. Once you get the spoon carving bug, you’ll probably start out with a few cooking spoons before quickly realizing that they’re going to consume every junk drawer in the kitchen if you don’t start giving some away. Sure, a few of the prized specimens will remain in the vase on the counter meant for oft-used utensils, but you’ll quickly settle on your favorites and the rest will stored in a dark corner, forgotten and forlorn.

Eating spoons, on the other hand, take up little of both your time and space. You can turn out a rather nice one in an hour or two. Unlike cooking spoons, for which a single spoon will suffice to prepare and serve an entire meal for the family, eating spoons are used in quantity. They’re cheap to ship and easy to carry to swap meets, so they make a convenient currency among spoon carvers. Most spoon carvers, therefore, will quickly switch from carving cooking spoons to mostly eating spoons.

But we forget, sometimes, how strangely the rest of the world views us and our wooden eating spoon habit. I know, sometimes it seems as though the whole world is carving spoons, but trust me: That’s just another social media bubble that we’ve created. “Normal” people think wooden eating spoons are weird. Eating spoons should be metal. They should stack neatly in a flatware tray, not lovingly displayed on a wall rack. They should have shiny polished bowls, not gently faceted surfaces from the hook knife. To “normal” people, the wooden eating spoon elicits imagery of a peasant sipping watery porridge from a communal bowl. It’s a relict of a bygone era.

The wooden cooking spoon, meanwhile, reminds people of grandma’s chicken and dumplings. Or grandpa’s peanut brittle. It feels nostalgic, but not antiquated.

The irony, of course, is that many of the most talented and creative contemporary woodworkers I know are spoon carvers. Check out the work of Maryanne, Amy, or Adam if you don’t believe me. My own work may not compare to theirs, but I can tell you that few things bring me as much joy as eating a bowl of mint chocolate chip ice cream with a little birch spoon that I carved for myself at Greenwood Fest three years ago.

Honestly, I think a wooden eating spoon is a bit like good beer or bourbon: You probably won’t like it the first time you try it, but if you’re motivated to like it, it’ll soon be one of those simple pleasures in life that you’re not likely to want to give up (and unlike beer or bourbon, you’ll not find yourself half-naked and surrounded by empties in the back of a pickup truck if you have one too many wooden spoons). Geez, I’m a terrible salesman. To conclude this subtle sales pitch, my little menagerie of eating spoons are patiently awaiting new owners. I’m rather proud of them. I think you’ll enjoy them as much as I do if you give them an honest try. But I must confess, I doubt if I’ll be carving many more. As far as I’m concerned, the people have already spoken.

Not Brave Enough

1990. That’s the year Home Alone came out.

Why am I awake, thinking about Home Alone at 5 AM on a Monday? Apparently, your brain makes funny connections when your seven-year-old daughter wakes you up to get her sound machine and stuffed dinosaur from the basement at 4 in the morning. (She had slept downstairs with her cousin the night before.)

Scared of the basement…Learn where the light switches are, kid…Although, Kevin McCallister was 8, and he was scared of the basement, and look at what he accomplished. Man, what an awesome movie. When did it come out…1990? Holy crap, Ellery is exactly the same age that I was when Home Alone came out…And that was…29 years ago…

And just like that, I’m wide awake and pondering my own mortality. And suddenly realizing that in about a third of the time that has elapsed between the release of Home Alone (which, let’s be honest, feels like yesterday) and the present, my oldest child will be packing her bags to go to college. And it’s the exact amount of time that I have been out of college. And I’ve spent every one of those years working for someone else. While dreaming about doing something else.

And that is why I’m self-employed.

Will I fail? That’s a definite possibility. One that I am prepared to accept. But life is short. A few people in the last week have congratulated me on having the courage to chase my dreams. I really don’t think that’s necessary. My family isn’t going to starve. If things go badly, it might mean taco night includes more rice and beans and less beef. We might have to put off buying new cars for a few years. The worst-case scenario is that I have to go back to being an employee. Is it really all that scary? I’ve already done it for a decade. What scares me is the thought that I might look back at my life and realize that I never tried. I don’t think I’m brave enough to take that risk.

You probably thought this blog was dead.

That’s never a good way to start off a blog post, but with a grand total of five posts since June 2016, you’d be forgiven for thinking as much. The last three posts, from just over a year ago, were in reference to the workshop that I was planning to build. If you follow me on Instagram, then you already know that the workshop has been “finished” since earlier this year. I’m pleased with it.

Okay, that’s an understatement. For more than a year, I poured sweat and stolen hours into this workshop. I sawed thousands of feet of oak, pine, and poplar. I built trusses, doors, and restored vintage windows. I hammered nails until my shoulder throbbed, and then I kept hammering. This shop is the culmination of two years of planning and work. It’s not big, and it’s not perfect, but I’m damn proud of it. There are still a few projects (insulation, interior paneling, and stairs) to work on before I can remove those quotation marks around the word “finished”, but at least my tools and workbench have a home.

The big news today – and the reason for the re-emergence of my blog – is to announce a change in my life that will afford a few more hours each week within these walls, and perhaps (fingers crossed) even a couple of hours for blogging. That’s right. Beginning this week, I leave behind the cozy comfort of gainful employment and begin life anew as a “business owner”. I’ll still be working about 3 days a week as a contractor for my former employer – and only one day a week at the office – which feels like a good balance to me. I quite enjoy the work that I do there, but I less enjoy being tethered to a desk for 45 hours a week.

My new life as a “business owner” gives me a laundry list of new obligations: quarterly taxes and accounting; marketing and business development; and perhaps most intimidating, learning to make things out of wood for profit and not merely for pleasure. I realize there is often a disconnection between “what I want to make” and “what someone will pay me to make”. I hope to bridge that gap over time. Meanwhile, my risk-averse wife would kindly appreciate your positive thoughts as I recklessly throw our steady, predictable life into utter disarray.

Designing My Workshop, Part 3: First Principles

After reflecting upon the past shops that I’ve inhabited and exploring some of the more appealing the shops of my fellow woodworkers, I thought long and hard about my own priorities. Much like when home-buying, it’s easy to let your imagination run wild, but there is a delicate balance to be achieved. Inflation of the footprint and architectural finery are appealing, but they add time to the build (and subtract time that I get to spend in the shop). But an unattractive or too-small shop is something that I would regret every time I stepped inside.

The basic principles that I came up with are thus:

Enough is enough. As noted previously, I’ve worked in shops that ranged from 192 sq.ft. to 900 sq.ft. I have not found the functionality of a shop to be strongly correlated with the size of its footprint, but I know well enough that a shop less than 200 sq.ft. won’t comfortably hold the equipment that I wish to use. Curtis Buchanan uses an equipment mix that appeals to me, and if he has been happy with a 16’x20′ shop for more than two decades, it stands to reason that I should as well. My shop will be at least 320 sq.ft., and not much bigger.

It’s not a garage. Every workshop that I’ve ever used has been a multi-use space for storage and disparate hobbies. In addition to woodworking equipment, the workshop served as a repository for electrical and plumbing tools, lawnmowers and oil-changing supplies, even Christmas ornaments and Easter baskets. No more. My workshop will not be a garage, but a woodshop, and I will reserve the same ire for extraneous appurtenances that Baptists reserve for halter tops in the sanctuary. To that end, one requirement will be a large lean-to to keep lawn mowers, fertilizer, tillers, and 2-cycle engine oil away from my dovetail saw.

Tradition is timeless. Yeah, I know that metal buildings are cheap and they go up in two days. I don’t care. I’m not going to look at this in my backyard every day for the rest of my life:

Ugly metal building
But that doesn’t mean that I aim for pretension or excess (looking at you, Victorians…) Rather, I’m drawn to the clean, simple look of rural farm buildings, built by competent craftsman who were skilled at balancing aesthetics with expediency and functionality. Something like this:

 
No sweat. I have never had the pleasure of working in a climate-controlled shop. Three out of four seasons, that’s not so bad. Spring and autumn are lovely in the South, and winter is easily addressed with an extra sweater on all but the most frigid of days. But summer will turn a tin-roof shack into a sauna (sans the naked Swedes). No more. My shop will be insulated, air-conditioned in the summer, and heated by wood stove in the winter. The more stable interior environment will not only be more pleasant, but also  reduce wood movement as furniture moves from the workshop to the house.

Don’t let the sun go down on me.  Natural light is important, but it’s not all created equal. I once had a shop in North Georgia with a dramatic southwest-facing view of the valley below and the mountains beyond. I foolishly placed my workbench directly beneath the window and quickly learned that the harsh late afternoon light was more hindrance than help. My shop will have big windows located on the northeast and northwest sides of the shop, with workbenches located beneath.

Let’s get high. Low ceilings suck. I once worked in a shop with 7′ ceilings. You can imagine how fun it was to work with 8′ lumber in there. Nine feet is the bare minimum for a workshop ceiling. Ten is better. Any higher than that approaches overkill, unless you’re doing specialized work that requires it. It’s nice to have a rafters low enough to hang your patterns – just ask Peter Follansbee.

follansbee hanging from the ceiling

Wood is good. Concrete floors suck. They’re hard on the knees and feet and even harder on your chisels and planes when you drop them. They’re an invitation to rot for any wood that touches it. My floor will be wood – no exceptions. And continuing with the idea that aesthetics are important, I also have a strong preference for wooden wall paneling. Wood is warm and attractive, and it makes a woodshop look like a woodshop. It also make it easy to hang tools on the walls – no sheetrock anchors required.

Lofty goals. I don’t think it’s a coincidence that all of the workshops I shared in the last post have storage lofts. No matter how hard I try to keep my workshop free of clutter, the truth is that it’s impossible not to accumulate infrequently-used templates and jigs and special odds and ends of wood and hardware. A small space for these items, out of the way and above the main workshop area, is a privilege that I’ve never had but would like very much to experience.

And finally,

Inside out. Flip open a copy of Better Homes and Gardens, and you’re likely to find advice on designing your home to ‘bring the outside in’. Well, I want just the opposite. A comfortable porch to set out my shavehorse, sawbenches, or hewing bench when the weather is pleasant is high on my wish list.

Designing My Workshop, Part 2: Other People’s Workshops

In Part 1, I shared a brief description and some lessons learned from each of my past workshops. Today, we’ll explore a few of the exceptional workshops of fellow woodworkers that inspired and informed my own design. (Be sure to click the links for a more in-depth look than I offer here). One thing you might notice if you’re familiar with these folks: They’re all Windsor chairmakers. Though it wasn’t a conscious decision to focus on the shops of Windsor chairmakers, it will come as no surprise if you’ve followed my interests on this blog. These guys use the tools that I like to use, and they work in ways in which I like to work. They designed their shops to be efficient with hand tools (and they know a thing or two about aesthetics to boot).

Greg Pennington’s workshop:

shop4

shop3

Dimensions: 18′ x 36′ (648 sq.ft. on the ground floor, plus a loft and porch)

Construction: Timber frame, asphalt shingle roof, clapboard siding, wooden floors and wall paneling.

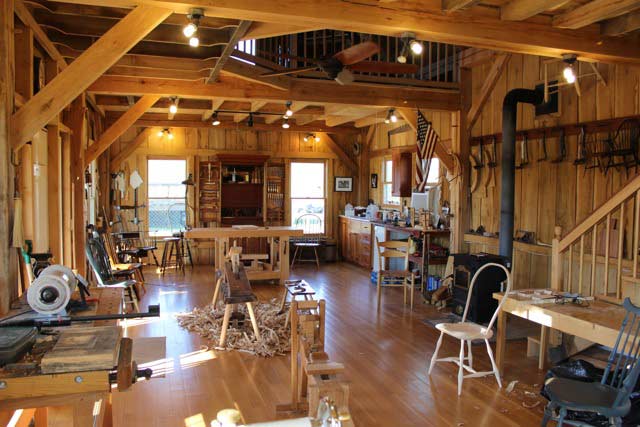
What I Like About It: Okay, let’s be honest. Greg’s shop is freaking gorgeous. Exposed post and beam construction, endless expanses of wood from floor to ceiling, windows on every wall. If I had unlimited time, this is the kind of shop that I would prefer to build. It’s a big, it’s inviting, and it’s finished out to a tremendous degree.

But… Greg uses the space to teach chairmaking workshops for several students at a time. It’s quite a bit more space than I can justify for the work that I do and the equipment that I use. And though the idea of a timber frame is appealing, I lack the tools and experience required to do an efficient job of timber framing. I’m completely on board with the wooden paneling and big windows, though.

Curtis Buchanan’s workshop:

Curtis Buchananan Workshop

CurtisBuchananan Workshop

Dimensions: 16′ x 20′ (320 sq.ft. on the ground floor, plus a loft and porch)

Construction: Timber frame, metal roof, board-and-batten siding, wooden floors and wall paneling.

What I Like About It: At less than half the size of Greg’s shop, this workshop is an appropriate size for a single woodworker – after all, it’s been the birthplace of Curtis’ phenomenal chairs for more than 20 years. It features wood floors and paneling and windows throughout. I especially like the well-used porch that wraps around two sides. A porch is the natural place to use a shavehorse, and it provides a lot of extra workspace for minimal effort. The unpainted exterior is attractive, unpretentious, and it saves time and money.

But… Curtis’ only power tools are a lathe and a bandsaw. I will be looking to house a few more electron hogs than he does, so a bit more space might be handy.

Elia Bizzarri’s workshop:

EliaBizzarri Workshop

Elia Bizzarri Workshop

Dimensions: 18′ x 28′ (504 sq.ft. on the ground floor, plus upstairs)

Construction: Stick frame, metal roof, clapboard siding, wooden floors and wall paneling.

What I Like About It: Killer paint scheme. I would totally copy it, if it didn’t utterly clash with my green-and-tan house paint. Besides that, I love the big double doors for moving equipment in and out with ease and the triplet of north-facing windows above a massive workbench. Like the other two shops, the wall paneling and flooring is wood, and it has a loft for storage. The size is just about perfect. An under-appreciated design element that I really like is the generous roof overhang. In the balmy Deep South, where wood rots if you sneeze on it, adequate protection from the weather is critical if you intend to use wood siding.

But… I really want a porch on my shop. Besides that, this approaches my Platonic ideal.

______________________________________________

So there you have it. Those are the three workshops that were agitating my gray matter as I sat down to make plans for my workshop. From these shops, and from my own experiences, I made a list of, let’s call them “first principles” for my workshop design. I’ll cover them in the next installment.

Designing My Workshop, Part 1

So, your new home is near-perfect, but devoid of a workshop. What’s a woodworker to do? If you’re like me, you are probably already skilled at gravely underestimating the time and scope required of even the most mundane projects. Naturally, you’ll convince yourself that building your own workshop will take less than a year of your free time, most of which has been long-affianced to raising three children, a dog, and ten chickens, maintaining a home, a large garden, and a small forest, and the occasional leisurely outing to appease your patient wife. Naturally.

All kidding aside, I have a number of good reasons for choosing to build my own workshop. 1) It’s cheaper.

Okay, one. I have one good reason to build my own workshop. But I have budgetary constraints and a high tolerance for self-inflicted stress. My dad lives ten miles away. He has a fully hydraulic Wood-Mizer sawmill and a surplus of logs. So lumber is pretty close to free. My labor is free as well (Note: If my boss is reading, don’t get any ideas). Aside from the lumber and labor, the major expenses in a workshop are sheathing, roofing, nails, screws, wiring, and insulation. Back-of-the-napkin math suggests that I can build my shop for at least 80% less than than I could pay someone to build it.

So I’m building my own workshop. Now the hard part is settling on a design. Blank slate. Endless possibilities. Where to begin? In the words of George Santayana, “Those who cannot remember the past are condemned to repeat it.” I have worked from multitudinous shops in the past. They all have something to teach:

2005-2007: 30′ x 30′ insulated metal building. Shared with my dad and younger brother, along with their mechanic tools, welding equipment, etc. Ample room in theory, but in practice, the shop was a cluttered mess due to and abundance of users and equipment and a lack of storage. Honestly, a great deal of the cluttered mess was attributable to yours truly – but over the years, I’ve found that a shop space that is too large is simply an invitation for clutter, because it always seems as though yesterday’s mess can be moved aside…until it can’t. And then you’ve got your work cut out for you just to get organized again.

2008-2010: 10′ x 20′ plywood shed. It was rotting from the ground up when I bought it, so I jacked it up, layed an extra layer of cement block, and re-built the floor. I wired it, insulated it, and paneled it with 1×12 pine. I spent far more time working on the shop than working in the shop. Even so, I quickly learned that 10′ is too dang narrow for a workshop. This was not the smallest shop that I’ve worked in, but due to the awkward dimensions, it was the least user-friendly (even after all of the cosmetic and structural improvements).

2010-2011: 20′ x 20′ cinderblock garage with dirt floor. No windows, bare lightbulbs, and sparse outlets. In spite of the austere surroundings, I build some rather nice stuff in this shop, including my first ladderback chairs. However, nothing short of starvation could convince me to work in a windowless, dirt-floor shop again. Aesthetics aren’t everything, but they are something.

2011-2014: 24′ x 40′ garage. 9′ ceilings, ample windows. The back of the shop was partitioned into two smaller rooms, one of which I kept for storage, the other I maintained as my hand tool shop. This could have been an ideal workspace, except for the inconvenient fact there was no door on the front of the shop. And money was too tight to actually add a garage door. I made peace with the constant maintenance required to keep the rust gremlins at bay, and I did some of my proudest work in that shop.

2014-2015: No workshop for nine months. I sold my tablesaw, planer, and drill press put the bandsaw and lathe in storage.

2015-2016: 12′ x 16′ plywood shack, slowly being devoured by an adjacent sand dune. Only enough room for a workbench and a lathe. Despite the crowded quarters and minimal equipment, I re-discovered the joy of woodworking in this shop. With no fancy equipment that I could rely on as a substitute for actual ability, I focused on projects that were suited to hand tool woodworking, and my skills improved markedly. I found it necessary to maintain an exceptionally neat workspace, and to work on only one project at a time, because there was simply no room for clutter.

2017: No workshop again. My tools are stored in the basement, waiting to be awakened in their new home. The drafting table awaits.

WorkshopByYear

Because I am also a nerd in addition to being a woodworker, I decided to plot out my shop size over the past dozen years. Of note is the fact that the quality of my work has steadily increased even as the size of my shop has varied wildly during that time. The lesson here is that the size of my shop might have an effect on the efficiency and enjoyability of my woodworking experience, but not the quality. Honestly, this should come as no surprise to anyone who has actually put steel to wood.

In the next few posts, I’ll highlight a few workshops that I haven’t worked in, but that served as inspirational/aspirational starting points for my design; cover the basic principles that guided my design; and finally, I’ll finish up with the blueprints that evolved from those principles.

All Roads Lead to Home.

It ‘s fitting that the last blog post on this site was entitled “Empty”. Originally intended as a descriptor of my workshop, vacated in advance of my relocation, I also serves as an accurate assessment of the volume of my writing during the intervening year. I’ll not bore you with excuses or apologies. I didn’t feel like writing, so I didn’t.

It doesn’t help – not one bit – that I’m in the midst of the longest stretch of my adult life without a workshop. When my family moved from Fernandina Beach, FL to Athens, GA last December, we were prepared to spend a couple months in my Dad’s guesthouse while we searched for a home of our own. We were in the market for our “forever” home. A place to put down roots and watch our children grow up. More acres than neighbors. An open patch for a garden and blueberry bushes. A forest to explore and trees to harvest for firewood and woodworking. And, of course, a spacious and inviting workshop.

The search was fruitless for about a month. My wife and I had different ideas of perfection. My heart was set on a small, outdated (read:ugly) home on 46 gorgeous acres of oaks and pastures. She gravitated towards a stately new home on a cul-de-sac with seven acres and four neighbors (at least the acre:neighbor ratio was right). We kept searching for a month, but my Dad’s tiny guest house seemed to grow smaller by the day with three kids underfoot. We finally compromised, and by compromise, I mean I agreed to make an offer on the home she wanted.

It took a week of back-and-forth with the inflexible corporate owners (the home’s builder had been a casualty of the financial crisis and was purchased out of bankruptcy), but we finally had a contract in our hands between Christmas and New Year’s. She was ecstatic, and I had warmed up to the fact that I wouldn’t have to spend thousands of dollars and hours of my life on repairs and upgrades.

The day after we signed the contract, our dream home hit the market.

It was only on 8 acres (plenty for my wife – a bit paltry for me), but they were the most gorgeous 8 acres in the county, as far as I was concerned. The house was perched upon a 100-foot bluff and nestled among soaring oaks and sprightly beeches. The elevation declined towards the north end of the property as the oaks gave way to tulip-poplars and river birches straddling a wide, lazy creek. A garden spot was already fenced in, as well as a dozen blueberry bushes and two rows of blackberries. A small orchard of peaches, pears, apples, and figs dotted one side of the garden, with a chicken coop and a garden shed on the other. The home itself was clean, cute, generously-sized and well-built, with spacious decks in the back and a covered porch on the front. It was Perfect.

I showed the pictures to my wife. She was…not happy. Quite the opposite, in fact. She knew I had initial reservations about the home on the cul-de-sac. Nonetheless, I assured her that I would be happy there (which was true. I’m happy most places). What was I doing still looking at houses? And besides, we have a contract!

Well, here’s the thing about real estate contracts: contingency clauses. We had 14 days to arrange financing and inspect the home, and during that period we could walk away for any reason. I was not prepared to go through with the biggest financial decision of my life when a home that we both liked better was on the market and ready for offers. She grudgingly agreed to let me arrange a viewing.

She was ready to make an offer the moment we walked through the front door. A month later, on January 31, 2017, we closed on the house. We’ve made it through one Gardening Season, and the Firewood Season is just getting started. It is home. It is Perfect.

Well, except for one little thing. There is no workshop. Not yet, anyway.

Empty

Yesterday, I took one last walk through the empty green plywood shack that served as my workshop for the past 15 months. It’s a curious little building. The wiring is a mix of modern Romex and salvaged lamp cords. Lights are placed haphazardly, and only a couple of them show any evidence of use in the last decade. The north side is slowly being consumed by the adjacent sand dune. I though about digging it back and fixing it when I first moved in, but honestly I was a bit concerned that the sand dune was a structural member at this point. Best to let sleeping dogs lie. An unpleasant side effect, though, was a shallow flood in the shop floor during every thunderstorm. I made peace with it by storing my lumber and tools off the floor and opening the doors for ventilation when the sun came out.


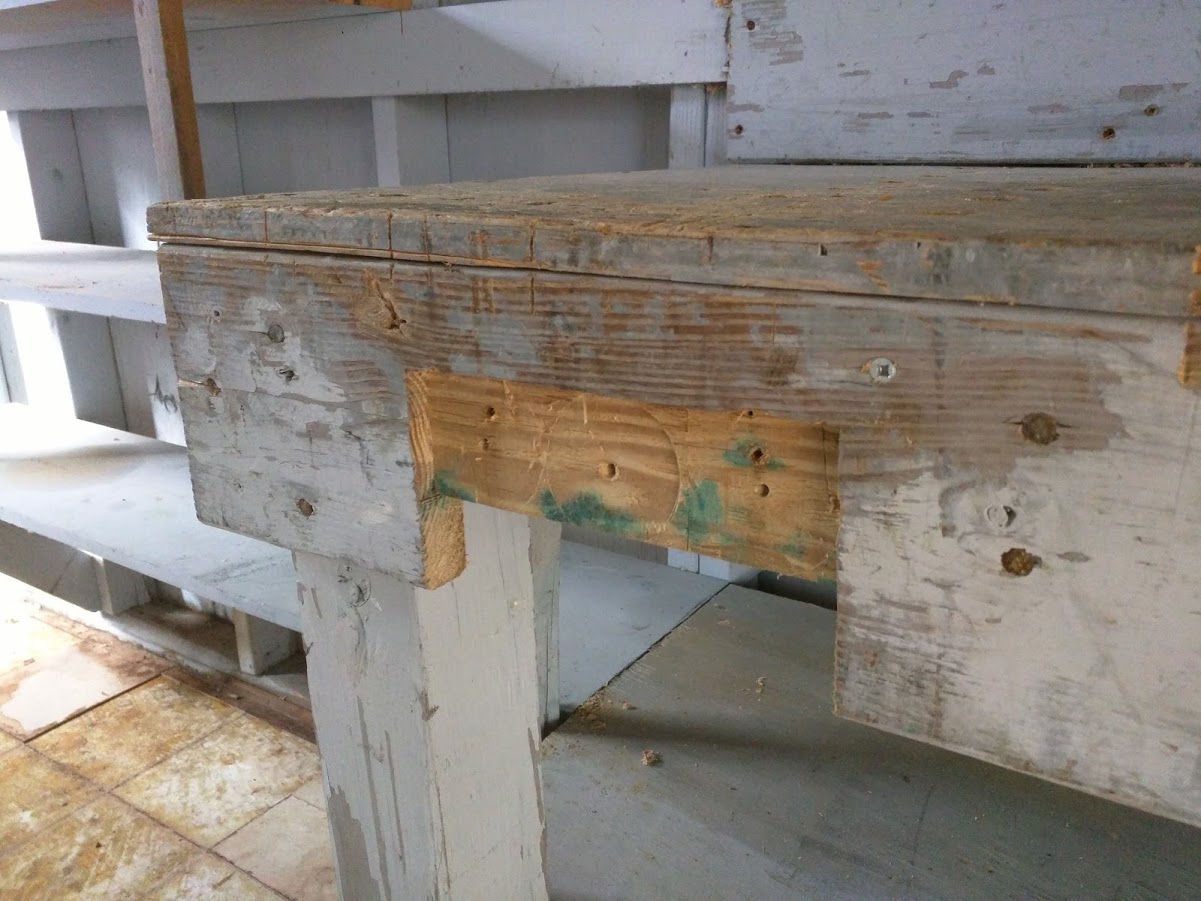
There was a workbench of sorts when I took possession of the property. It was about four inches too high, but I remedied that after my first exhausting planing session. The top was 3/4″ plywood, but I braced it with battens screwed in from below. There were no workholding devices, but it was a simple matter to let in a face vise. No hope for a tail vise, though: the right side of the work bench butted up against a wall.

There was no room for my power tools in this diminutive abode. I sold my tablesaw and my drill press to my brother. I loaned my bandsaw to my Dad. I sold my surface planer at a yard sale. Luckily, a lathe doesn’t take up much room – I was able to squeeze it in underneath the shop’s only window.

In spite of all of its shortcomings, this little shop enabled some of my most productive time as a woodworker. A kitchen table, a candlestand, three Windsor chairs, a tavern table, a shavehorse, a side table, and many spoons, bowls, plates, and pieces that I never even bothered to mention were birthed in that shop. All in a brief 10-month bout of inspiration. I became a competent spindle-turner, an efficient hand-planer, and a half-decent drawknifist (I’m just gonna pretend that’s a word) in that shop.

The learned eye would recognize my presence in an instant.

The mortise for the old face vise:

workbench2

The scars of countless chisel strikes and saws marks:

workbenchscars

Not to mention the double-row of dog holes.

Will a learned eye ever set foot in this shop again? I doubt it. But I’m happy to know that I’ve left my mark on this place. Yeah, I know. It’s a humble, dingy place. A shitty setting for Instagram photos. I leave with the hope that a brighter setting awaits my arrival. But I was there, and a part of me with always be there.

Goodbye, Fernandina Beach. Best of luck.

P.S.: WordPress tells me that it’s been 5 months since my last post. I never meant to leave you that long. But a funny thing happens when a hobby begins to feel like an obligation: I lose interest. I doubt I’ll achieve the several-post-per-week production pace of my early days, but I do plan on keeping a little better track of things than I have recently. I suspect the internet is at least as permanent as my old workshop, so I’ll continue to try and leave my mark here as well.


Fits and Starts

As a hobbyist woodworker, I love having the complete freedom to pursue my interests. Spoon-carving? Cheap, easy and portable. Bowl turning? Wet, ribbony shavings of bliss. Kitchen table? Nice to have a big project every now and then. Side tables? I can knock one out in a weekend! Windsor chairs? The decathlon of woodworking skills, bring it on.

The problem with having this much freedom – and so many disparate interests – is that I end up with more than enough rope to hang myself. I take on too much at once, and with no looming deadlines to focus my attention, I flit from one project to the next while nothing much gets accomplished at all.
Such was the situation that I found myself in about a month ago. I had a side table close to completion (Inspiration Doesn’t Strike…), a continuous-arm high chair with all of the parts made (some assembly required) and a billet of thick curly maple that’s been kicking around my shop since this spring as my friend patiently waits for me to turn it into a gunstock (hunting season, the ostensible deadline, seems perpetually distant). Not to mention a half dozen other projects too piddly to mention.

When I find myself stumbling over half-finished projects every time I enter my shop, I know it’s time to buckle down and get something out the door.

I decided that the high chair would be the first project to cross off of my list. There really wasn’t that much left to do, and I’ve done it all before.

Evening 1: Turn the oven-dried tenons to fit, bore holes for the stretchers, and assemble the the undercarriage.

Evening 2: Bore holes into the spindle deck and the arm rail, shave the spindles to size, and dry fit.

Evening 3: Assembly time! Shave a buttload of oak wedges, warm the hide glue, and cross my fingers.


And just like that, a project is out of my shop ready for a finish.

This chair will be black-over-red, like all the others. To be honest, I’m getting tired of this paint scheme (this will be my fourth Windsor chair of the same complexion), but since all of these chairs sit around our dining room table, my wife has reasonably requested that they match.

I will eschew the milk paint on this chair, which has given me grief and mixed results in the past. I plan on mixing up some red oil paint for the base coat and some black tinted shellac for the topcoat. Aside from its ease of use, the biggest benefit to starting with red oil paint is that it will require several days to cure…which means that I will have an excuse to put this chair aside while I turn my attention to other projects…


A Revelation

One of the reasons I was most looking forward to Greenwood Fest was for the opportunity to look over Dave Fisher’s shoulder as he did some letter-carving. Dave is a maestro at this work (for example, herehere and here). He has even done a blog post specifically about lettering. But a blog just didn’t quite give me the confidence to try it – I wanted to see it in action.

To be honest, I have tried letter-carving in the past, but I was never particularly happy with the results. In fact, I actually carved my initials into the very first spoon I ever carved, six years ago in 2010. I had no sloyd or spoon knives at that point. I carved the whole thing with a gouge and a drawknife, and then I carved the letters with a chisel. The spoon is quite good – I still use it every week:

6 JAT
Despite being made from a soft, open-pored wood (catalpa), this thing still does an admirable job of scooping mashed potatoes onto a plate.

And the letters are neat enough, but also pretty bland and lifeless. Not something I really want to showcase on all of my spoons:

7 JAT

I didn’t try to carve letters again for three more years. When my first son was born in 2013, he spent nine days in the NICU. There wasn’t much that I could do for him, but could carve a spoon for him. I decided to try carving letters again. By this point, I had proper spoon-carving knifes, so I attempted to do the letters with the tip of my sloyd knife. The sentiment was laudable, but the execution was not. It’s the thought that counts?

8 Elam
Sweet sentiment, sloppy execution. Sorry, Elam.

Anyway, after that I was pretty much ruined on letter-carving until I had some proper instruction. After quizzing Dave about his tools, techniques, and unspoken wisdom, I was ready to give it another go. The biggest takeaway? A knife with a short blade and a rather tight radius near the tip seems to be mission-critical. He uses the tip of a pen knife. I had this little guy which seems to be close to the proper geometry:

1 Pencil
The radius of the tip could be a little tighter, but it’s a lot better than a sloyd knife.

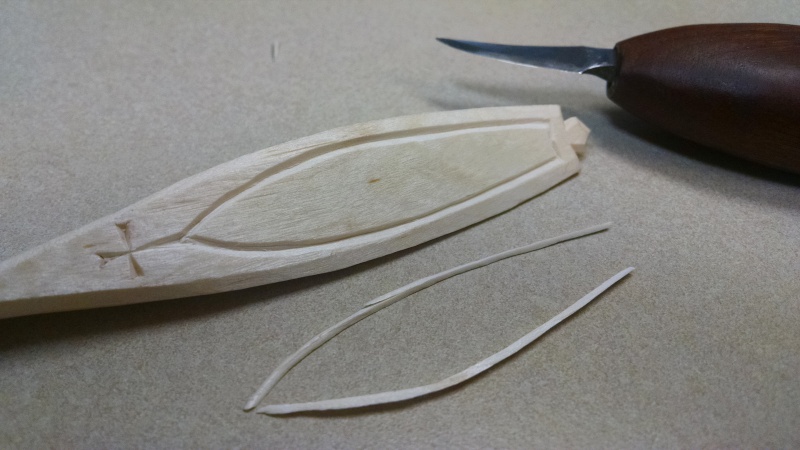
After sketching a simple design that I liked, I did my best to follow the lines, being careful not to cut too deeply (but also not being too timid either. No need to go over the same cut five times to get to the proper depth). Long, flowing lines like this were actually pretty easy to execute. It’s the stopping and starting that makes it tough!

2 Chips

3 Elam
Elam’s new spoon: a significant improvement.

I was pretty pleased with how Elam’s new spoon turned out, but the cursive lettering was tricky. I highly recommend starting with all-caps font. Straight lines are a lot more fun than tight curves. It might be impolite when sending emails to your co-workers, but it’s perfectly acceptable to shout on a spoon.

5 Ellery
My daughter’s spoon turned out even better.

I was on a roll, so I decided to keep going. I carved a quick spoon while I was at Greenwood Fest and ate with it all week. Peter Follansbee made it “famous” on his first blog post after the event (sixth picture from the top). In honor of its provenance, I decided to give the spoon an appropriate name:

4 Green

So now I have a new skill that I’m not altogether embarrassed about. Score one for the home team, and Tip o’ the Hat to you, Dave Fisher.